Introduction: Revitalizing Your Ceiling with a Fresh Coat of Paint
The ceiling often serves as an overlooked canvas in interior design, yet it holds immense potential to transform the ambiance and aesthetics of a room. Painting ceiling tiles is a cost-effective and creative way to breathe new life into your space, adding depth, character, and visual interest. In this comprehensive guide, we’ll walk you through the step-by-step process of painting ceiling tiles, empowering you to unleash your creativity and revitalize your living environment with confidence.

Preparation is Key: Gathering Materials and Planning Your Project
Before diving into the painting process, it’s crucial to gather the necessary materials and carefully plan your project. Start by assessing the condition of your ceiling tiles and determining whether any repairs or cleaning are required. Next, gather the following materials:
- Primer suitable for ceiling tiles
- High-quality paint in your desired color
- Paintbrushes or rollers
- Painter’s tape
- Drop cloths or plastic sheeting
- Sandpaper or sanding block
- Cleaning supplies (e.g., mild detergent, water, sponge)
Once you have your materials assembled, choose a well-ventilated area to work in and protect your floors and furniture with drop cloths or plastic sheeting to prevent any accidental paint splatters or spills.
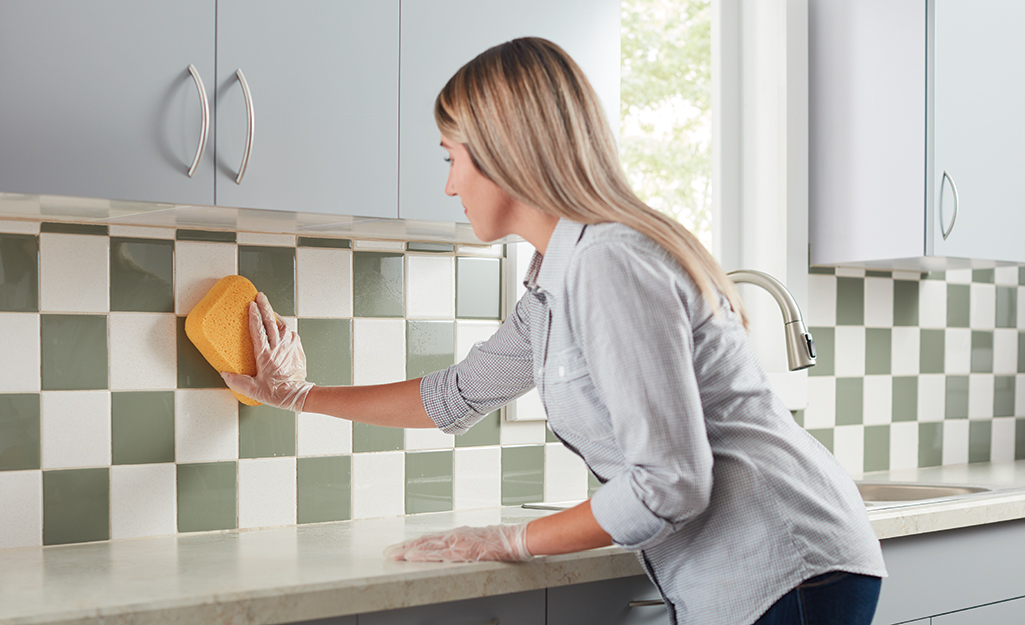
Step 1: Preparation and Cleaning
Begin by thoroughly cleaning the ceiling tiles to remove any dust, dirt, or grease that may interfere with paint adhesion. Use a mild detergent mixed with water and a sponge to gently scrub the tiles, then rinse with clean water and allow them to dry completely. If the tiles have any stubborn stains or residues, you may need to use a degreaser or cleaner specifically formulated for ceiling tiles.
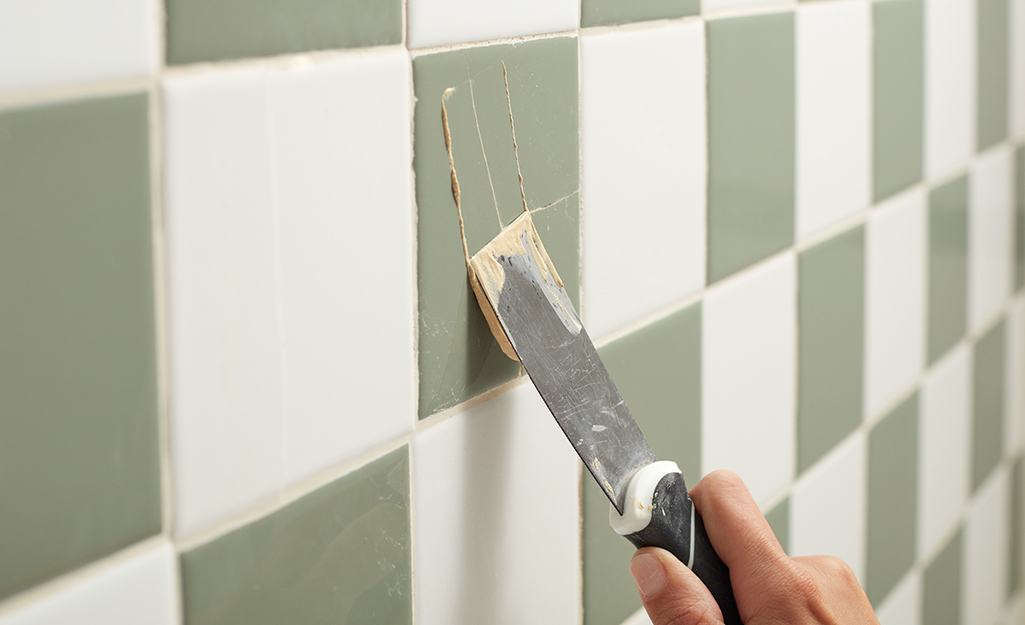
After cleaning, inspect the tiles for any cracks, holes, or damage. Use spackling compound or caulk to fill in any imperfections, then sand the surface smooth once the filler has dried. This step ensures a smooth and uniform finish when painting.
Step 2: Priming the Surface
Priming is essential for promoting paint adhesion and achieving an even finish, especially on porous or uneven surfaces like ceiling tiles. Apply a coat of primer formulated specifically for ceiling tiles using a paintbrush or roller, ensuring full coverage over the entire surface. Allow the primer to dry completely according to the manufacturer’s instructions before proceeding to the next step.
Priming not only enhances paint adhesion but also helps seal the surface and prevent stains or discoloration from bleeding through the paint, ensuring a professional-quality finish that lasts.
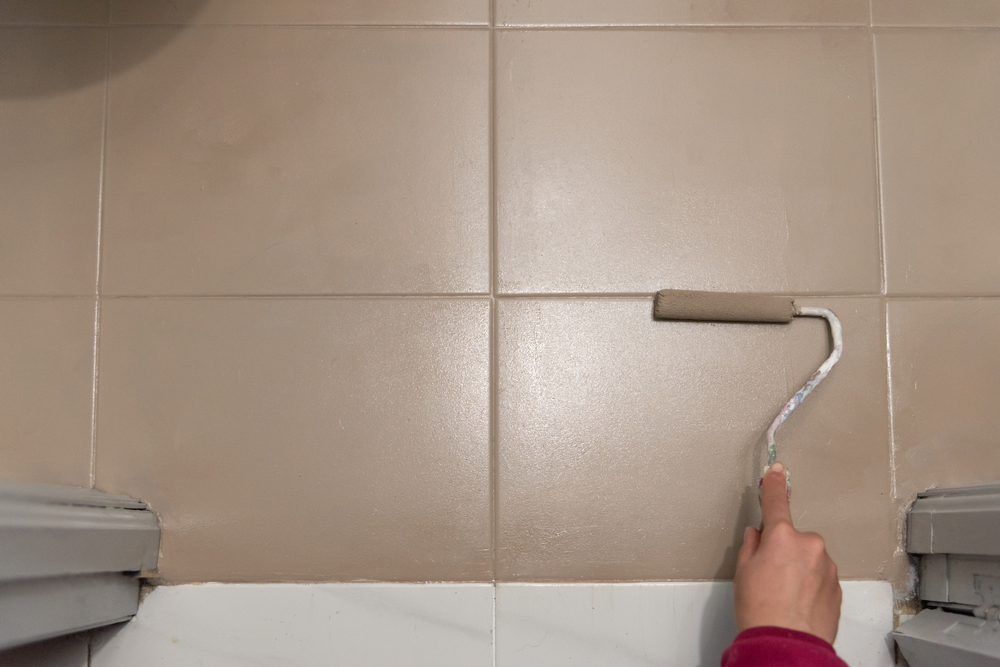
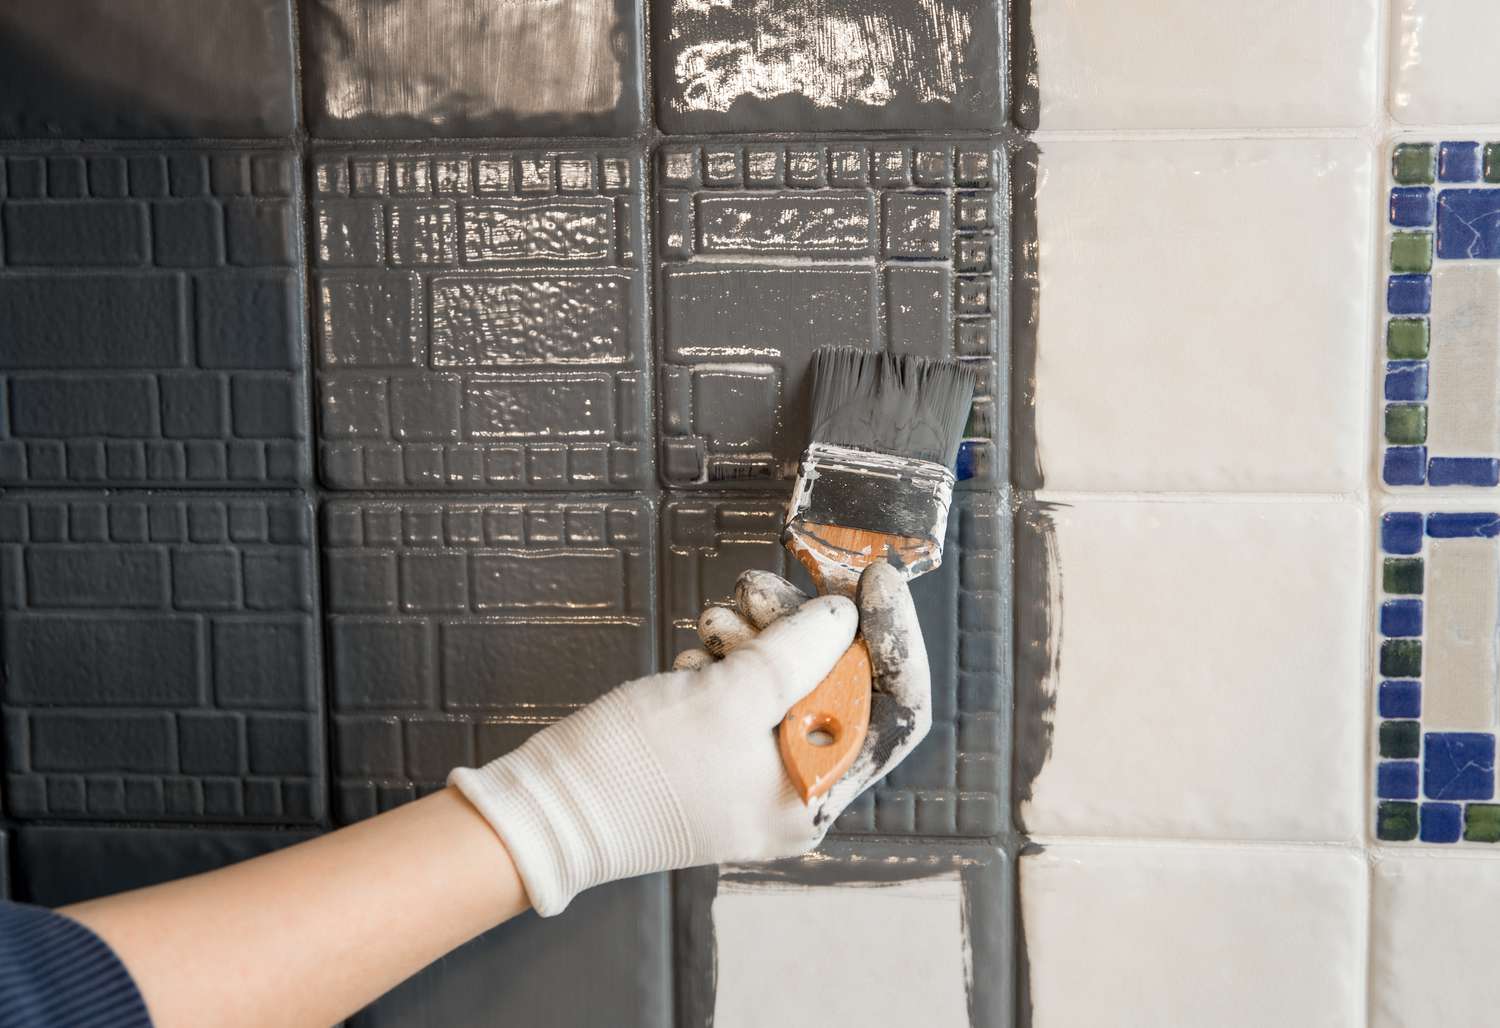
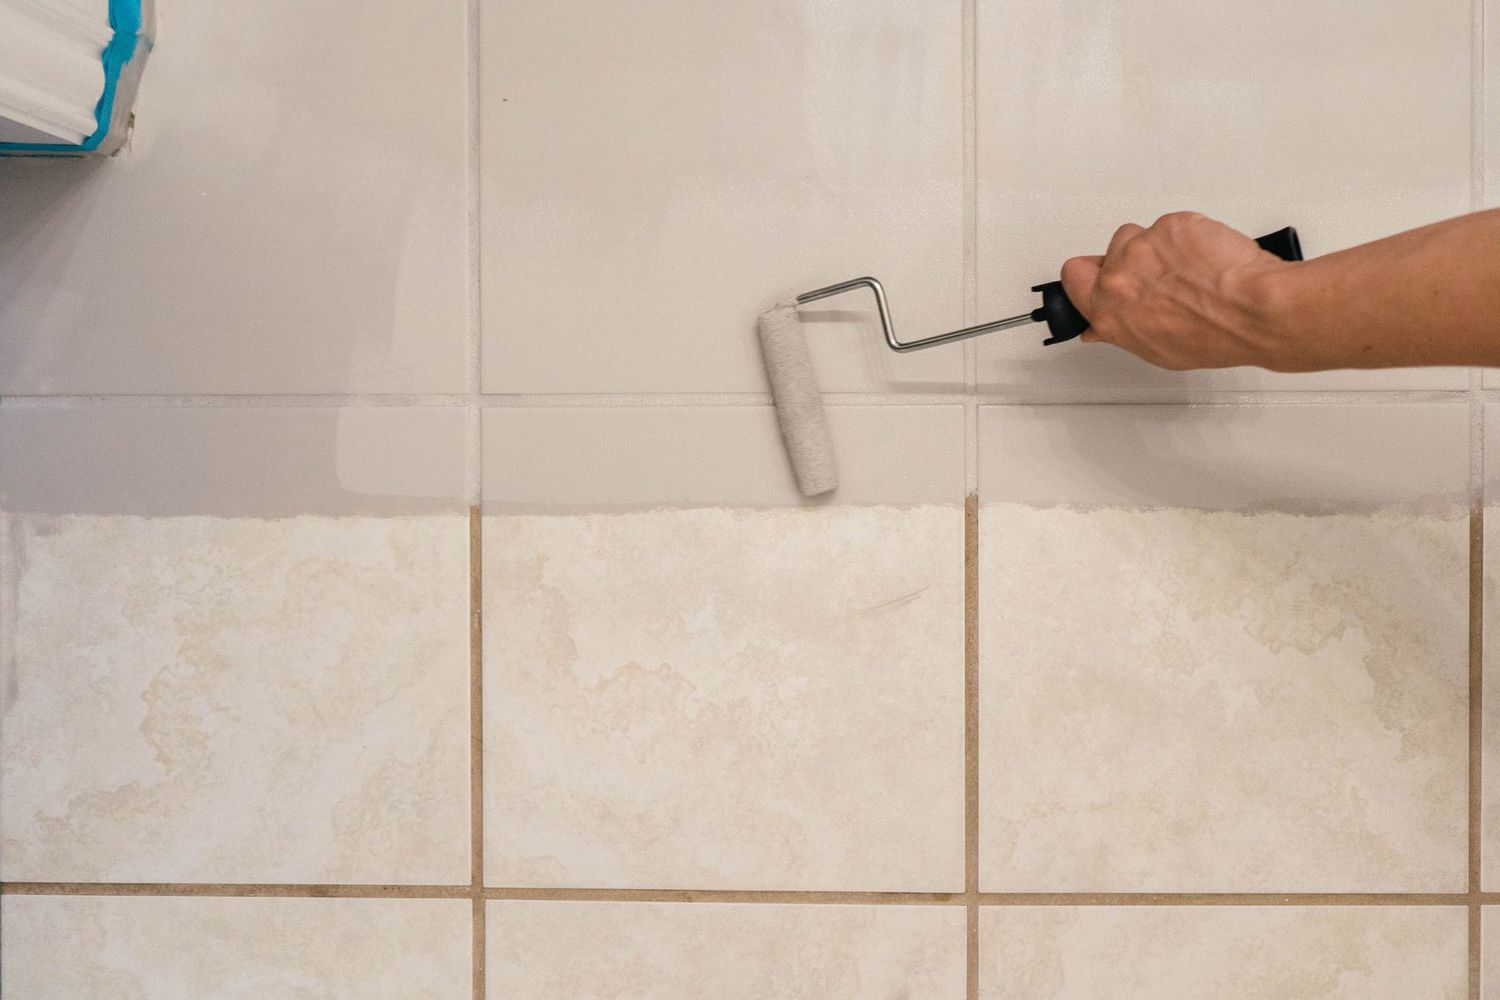
Step 3: Applying the Paint
Once the primer has dried, it’s time to apply the paint. Choose a high-quality paint suitable for use on ceiling tiles, preferably in a semi-gloss or satin finish for easy maintenance and durability. Stir the paint thoroughly before use to ensure a consistent color and texture.
Using a paintbrush or roller, apply the paint evenly over the surface of the ceiling tiles, working in small sections to avoid drips or uneven coverage. Be sure to overlap each stroke slightly to blend the paint seamlessly. If you’re painting textured tiles, take care to work the paint into the crevices and grooves for uniform coverage.
Allow the first coat of paint to dry completely before applying additional coats as needed for full coverage and depth of color. Depending on the condition of your tiles and the color you’re using, you may need to apply two or more coats for optimal results.
Step 4: Adding Finishing Touches
Once the final coat of paint has dried completely, inspect the ceiling tiles for any touch-ups or imperfections. Use a small brush to correct any uneven edges or areas where the paint may have dripped or pooled.
If desired, you can also add decorative accents or stenciled designs to further personalize your painted ceiling tiles. Use painter’s tape to create clean lines and borders for your designs, then carefully apply the paint using a small brush or stencil brush. Allow the paint to dry completely before removing the tape to reveal crisp, professional-looking designs.
Step 5: Cleaning Up and Enjoying Your Newly Painted Ceiling
Finally, once you’re satisfied with the results, carefully remove any painter’s tape and clean up any drips or spills with a damp cloth or sponge. Allow the paint to cure fully according to the manufacturer’s instructions before reattaching any light fixtures or ceiling vents.
With your painting project complete, take a moment to step back and admire the transformation of your space. The freshly painted ceiling tiles add a touch of elegance and sophistication, breathing new life into the room and creating a more inviting and visually appealing environment for you and your guests to enjoy.
Exploring Color Options: Enhancing Mood and Atmosphere
One of the most exciting aspects of painting ceiling tiles is the opportunity to experiment with different colors and shades to enhance the mood and atmosphere of your space. Consider the overall aesthetic of the room and the effect you wish to achieve when selecting a paint color. Lighter shades such as soft neutrals or pastels can make a room feel more spacious and airy, while darker hues like deep blues or charcoal grays add drama and sophistication. Additionally, incorporating bold accent colors or metallic finishes can create visual interest and focal points within the room, allowing you to express your personal style and creativity.
Utilizing Patterns and Textures: Adding Depth and Dimension
In addition to color, you can also use patterns and textures to add depth and dimension to your painted ceiling tiles. Consider incorporating geometric patterns, stripes, or floral motifs for a whimsical or modern touch, or opt for faux finishes such as marble, wood grain, or metallic effects to mimic the look of more expensive materials. Stencils, sponges, or specialized painting techniques can be used to create intricate designs and textures, allowing you to customize your ceiling tiles to suit your aesthetic preferences and complement the overall decor of your space.
Conclusion: Unleash Your Creativity and Transform Your Space
Painting ceiling tiles is a rewarding DIY project that allows you to unleash your creativity and refresh your living environment with minimal time and expense. By following this step-by-step guide and taking the time to properly prepare and execute your painting project, you can achieve professional-quality results that enhance the ambiance and aesthetics of any room. So gather your materials, roll up your sleeves, and embark on a journey of transformation as you breathe new life into your space with the timeless allure of painted ceiling tiles.