
Introduction: Understanding the Importance of Proper Drain Installation
Installing a sink drain may seem like a simple task, but doing it correctly is crucial for preventing leaks, clogs, and other plumbing issues down the line. In this comprehensive guide, we’ll walk you through the step-by-step process of installing a sink drain like a professional plumber. From gathering the necessary tools and materials to testing the system for leaks, we’ll cover everything you need to know to ensure a successful installation.
1. Gather the Necessary Tools and Materials
Before you begin installing the sink drain, gather all the tools and materials you’ll need for the job. This typically includes a wrench, plumber’s putty or silicone sealant, Teflon tape, a hacksaw or pipe cutter, a bucket, a level, and the sink drain assembly kit, which typically includes the drain pipe, trap, and fittings. Having everything prepared beforehand will streamline the installation process and help prevent any delays or interruptions.

2. Turn Off the Water Supply
Before you can start working on the sink drain, it’s essential to shut off the water supply to the sink. Locate the shut-off valves beneath the sink or at the main water supply line and turn them clockwise to close them. Once the water supply is turned off, open the faucet to drain any remaining water from the pipes and relieve any pressure in the system.
3. Remove the Old Drain Assembly
If you’re replacing an existing sink drain, you’ll need to remove the old drain assembly first. Use a wrench to loosen the slip nuts connecting the P-trap to the drain pipe and the tailpiece coming down from the sink. Once the slip nuts are loosened, carefully detach the P-trap and tailpiece from the drain pipe and remove any remaining fittings or debris from the sink’s drain opening.
4. Prepare the Sink and Drain Components
With the old drain assembly removed, it’s time to prepare the sink and drain components for installation. Clean the area around the sink’s drain opening to remove any dirt, grime, or old sealant. Then, apply plumber’s putty or silicone sealant to the underside of the drain flange before inserting it into the sink’s drain opening. Ensure that the drain flange is centered and level before proceeding to the next step.
5. Install the Drain Pipe and P-Trap
Once the drain flange is in place, insert the drain pipe through the sink’s drain opening from underneath. Secure the drain pipe to the sink’s drain opening using the provided locknut, and tighten it with a wrench to create a watertight seal. Next, attach the P-trap to the drain pipe and the tailpiece using slip nuts, ensuring that the trap is positioned correctly to prevent leaks and allow for proper drainage.
6. Connect the Tailpiece to the Sink’s Drain
With the P-trap in place, connect the tailpiece coming down from the sink to the top of the P-trap using another slip nut. Make sure the tailpiece is aligned properly with the drain opening and the P-trap to prevent any leaks or misalignments. Use a wrench to tighten the slip nut securely, but be careful not to overtighten it, as this could damage the fittings or cause leaks.

7. Check for Leaks and Adjustments
Once the sink drain is fully installed, it’s essential to check for any leaks and make any necessary adjustments before turning the water supply back on. Fill the sink with water and let it drain while inspecting the connections for any signs of leakage. If you detect any leaks, tighten the slip nuts or adjust the fittings as needed to create a proper seal. Use a bucket to catch any excess water and prevent damage to the surrounding area.
8. Test the Drainage and Reassemble the Sink
After confirming that there are no leaks, test the sink’s drainage by running water through the faucet and observing how quickly it drains away. If the water drains smoothly without any backups or gurgling noises, you’ve successfully installed the sink drain. Finally, reassemble any components you removed during the installation process, such as the P-trap and tailpiece, and ensure that everything is securely tightened and properly aligned.
9. Considerations for Special Situations
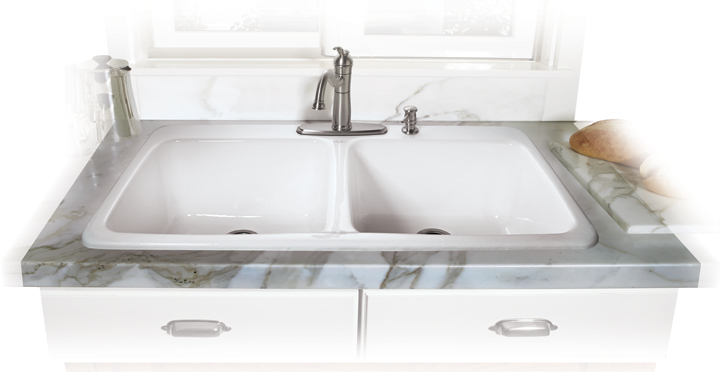
While the general steps outlined above apply to most sink drain installations, there are some special situations to consider depending on your specific setup. For example, if you’re installing a sink in a kitchen or bathroom island without access to a traditional wall for drainage, you may need to use an air admittance valve (AAV) to vent the drain system and prevent sewer gases from backing up into the sink. Additionally, if you’re installing a double sink or a sink with multiple basins, you’ll need to adjust the drain configuration accordingly to ensure proper drainage and prevent one basin from overflowing into the other.

10. Tips for Maintaining Your Sink Drain
Once your sink drain is installed and functioning correctly, proper maintenance is key to ensuring its long-term performance and preventing issues such as clogs or leaks. To keep your sink drain running smoothly, avoid pouring grease, oil, or food scraps down the drain, as these can accumulate and cause blockages over time. Additionally, periodically flush the drain with hot water or a mixture of baking soda and vinegar to remove built-up debris and maintain optimal flow.
11. Troubleshooting Common Issues
Despite your best efforts, you may encounter issues with your sink drain over time, such as slow drainage, foul odors, or leaks. If you notice any of these problems, don’t panic—many issues can be resolved with simple troubleshooting steps. For example, if your sink is draining slowly, try using a plunger or a drain snake to remove any obstructions blocking the flow of water. If you detect foul odors coming from the drain, flushing it with hot water and baking soda can help eliminate bacteria and odor-causing substances. And if you discover a leak in the drain system, check the connections for tightness and replace any damaged or worn-out components as needed.

Conclusion: Enjoy Your Newly Installed Sink Drain
Installing a sink drain may seem daunting at first, but with the right tools, materials, and guidance, it’s a manageable task that can be completed in a relatively short amount of time. By following the step-by-step instructions outlined in this guide, you can ensure a professional-quality installation and enjoy peace of mind knowing that your sink’s drainage system is functioning correctly. Whether you’re replacing an old drain assembly or installing a new one from scratch, taking the time to do it properly will pay off in the long run with reliable performance and minimal maintenance requirements.

