
Introduction: Elevating Your Bathroom with a New Sink
Upgrading your bathroom can significantly enhance the aesthetic appeal and functionality of your space, and one of the most impactful changes you can make is replacing an old, outdated sink. Whether you’re looking to modernize your bathroom or address issues like leaks or damage, replacing a sink is a project that can be tackled with the right tools, materials, and know-how. In this comprehensive guide, we’ll walk you through the steps to replace a sink like a pro, transforming your bathroom into a stylish and functional oasis.
Assessing Your Needs: Choosing the Right Sink
Before diving into the replacement process, it’s essential to assess your needs and preferences to choose the right sink for your bathroom. Consider factors such as the size of your bathroom, existing plumbing configuration, and your aesthetic preferences. Determine whether you want a drop-in, undermount, pedestal, or wall-mounted sink, and select a style and material that complements your bathroom decor. Measure the dimensions of your current sink and countertop to ensure a proper fit for the new sink. Taking the time to make informed decisions at this stage will set the foundation for a successful replacement project.
Gathering Your Tools and Materials: Essential Supplies for the Job
Once you’ve selected the right sink for your bathroom, gather the necessary tools and materials to complete the replacement process smoothly. Common tools you’ll need include an adjustable wrench, pipe wrench, screwdriver, utility knife, basin wrench, and plumber’s putty. Additionally, gather plumbing supplies such as PVC pipes, fittings, Teflon tape, and a new faucet if needed. Ensure you have safety equipment such as gloves and safety glasses to protect yourself during the project. Having all the tools and materials on hand will streamline the replacement process and minimize interruptions.
Preparing the Workspace: Clearing the Area and Shutting Off Water
Before removing the old sink, prepare the workspace by clearing the area around the sink and ensuring ample space to work comfortably. Remove any items stored in the vanity or on the countertop to prevent damage or obstruction during the replacement process. Next, shut off the water supply to the sink by turning off the shut-off valves located beneath the sink or at the main water supply line. Open the faucet to drain any remaining water in the pipes and place a bucket or towels beneath the sink to catch any drips or spills. Taking these preparatory steps will create a safe and organized environment for replacing the sink.
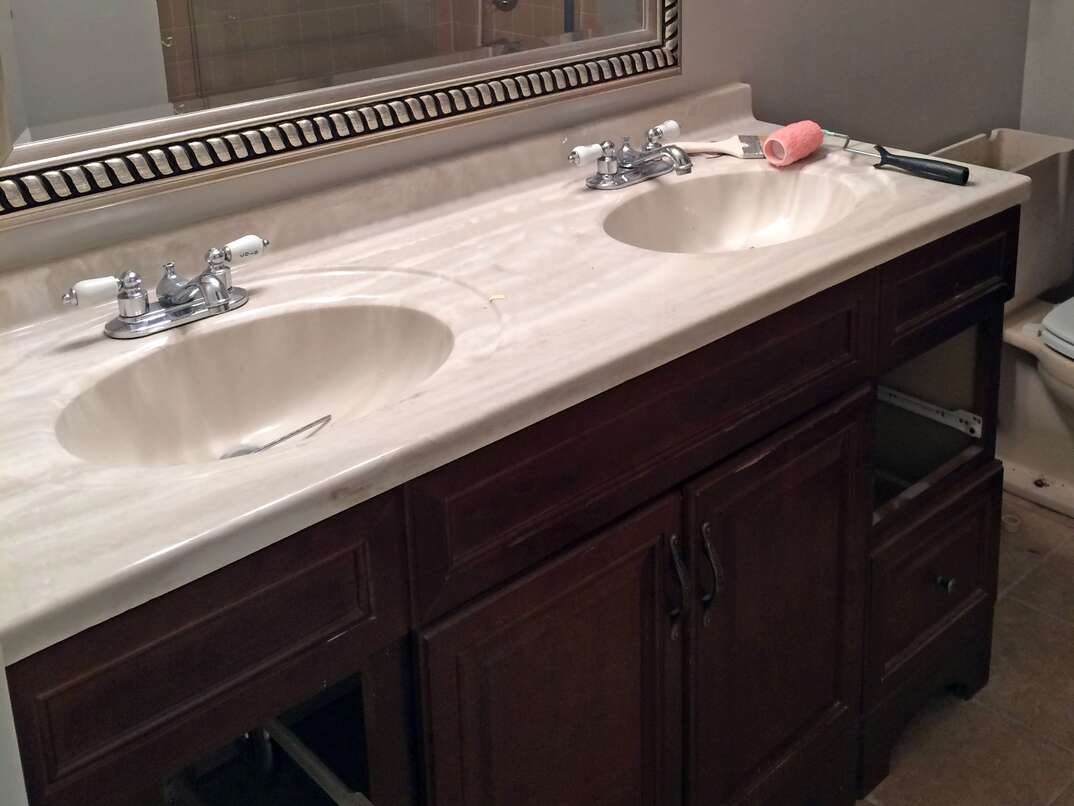
Removing the Old Sink: Disconnecting Plumbing Connections
With the workspace prepared and the water supply shut off, it’s time to remove the old sink. Start by disconnecting the plumbing connections, including the P-trap, supply lines, and any other fittings or connections securing the sink to the wall or countertop. Use a wrench to loosen and remove nuts and fittings, taking care to support the weight of the sink as you work. Once all plumbing connections are detached, carefully lift the old sink out of the vanity or countertop and set it aside. Inspect the area for any damage or leaks that may need to be addressed before installing the new sink.
Preparing for Installation: Cleaning and Making Adjustments
Before installing the new sink, take the opportunity to clean the area thoroughly and make any necessary adjustments to the plumbing or countertop. Remove any debris or residue from the countertop surface and clean the surrounding area with a mild detergent and water. If needed, adjust the height or position of the plumbing connections to ensure a proper fit for the new sink. Check for any damage or deterioration in the countertop or vanity that may require repairs or reinforcement before proceeding with the installation. By preparing the area meticulously, you’ll create a clean and stable foundation for the new sink.

Installing the New Sink: Securing and Connecting Plumbing
With the workspace prepared and adjustments made, it’s time to install the new sink. Start by placing the sink into position on the countertop or vanity, ensuring it is centered and level. Secure the sink in place using mounting brackets or clips provided with the sink, following the manufacturer’s instructions. Next, reconnect the plumbing connections, including the P-trap, supply lines, and any other fittings or connections. Use a wrench to tighten nuts and fittings securely, taking care not to overtighten and risk damaging the connections. Once all plumbing connections are secure, turn on the water supply and check for leaks or drips. Make any necessary adjustments to ensure a watertight seal and proper functioning of the new sink.

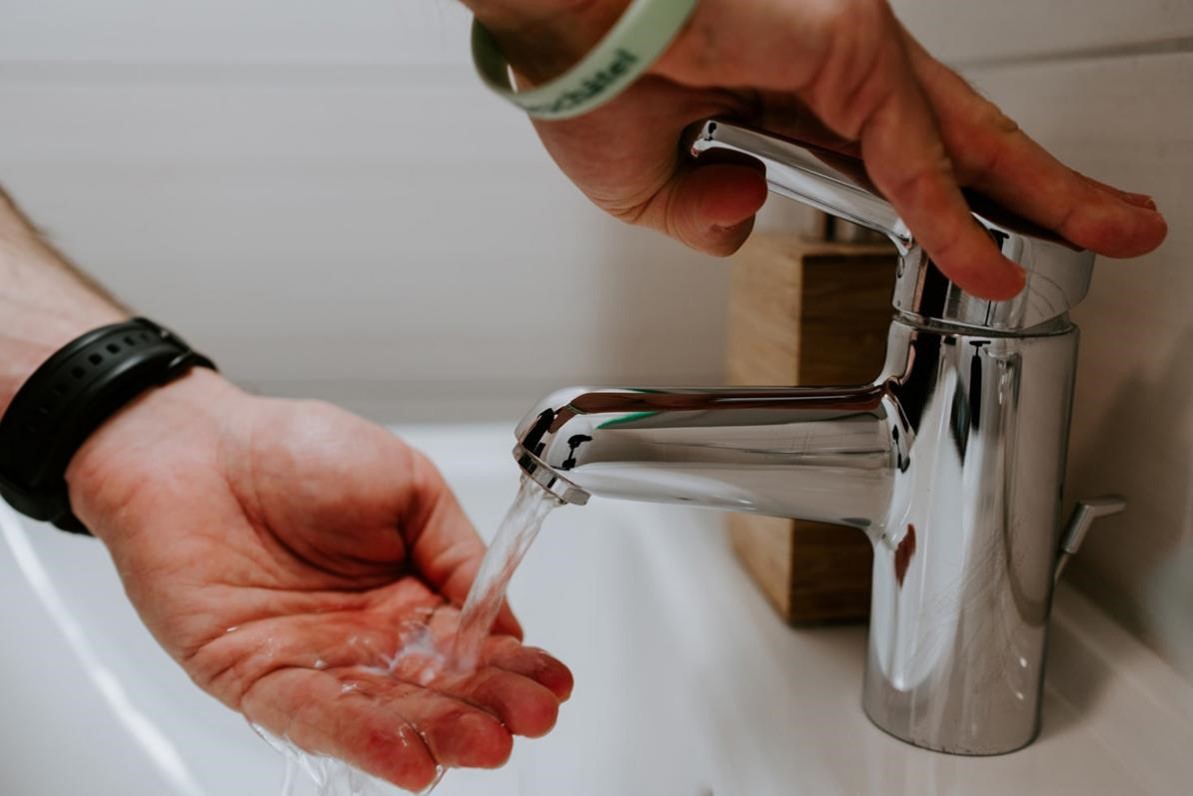
Adding Finishing Touches: Installing Faucet and Sealing
With the new sink securely installed and plumbing connections made, it’s time to add the finishing touches to complete the replacement process. Install the faucet according to the manufacturer’s instructions, ensuring a proper fit and secure attachment. Apply plumber’s putty or silicone sealant around the base of the faucet and any other openings in the sink to create a watertight seal. Wipe away any excess putty or sealant and allow it to dry thoroughly before using the sink. Finally, test the faucet and drain to ensure proper functionality and address any issues promptly. With the finishing touches in place, step back and admire your newly upgraded bathroom sink, ready to enhance your daily routine with style and functionality.

Conclusion: Enjoying Your Upgraded Bathroom
In conclusion, replacing a bathroom sink is a rewarding project that can elevate the appearance and functionality of your space with relatively little effort. By assessing your needs, gathering the right tools and materials, preparing the workspace, removing the old sink, installing the new sink, and adding finishing touches, you can replace a sink like a pro and transform your bathroom into a stylish and functional oasis. Whether you’re upgrading for aesthetic reasons or addressing issues like leaks or damage, tackling a sink replacement project will leave you with a sense of accomplishment and a bathroom you’ll love to spend time in. So roll up your sleeves, follow these steps, and enjoy your newly upgraded bathroom sink for years to come.

