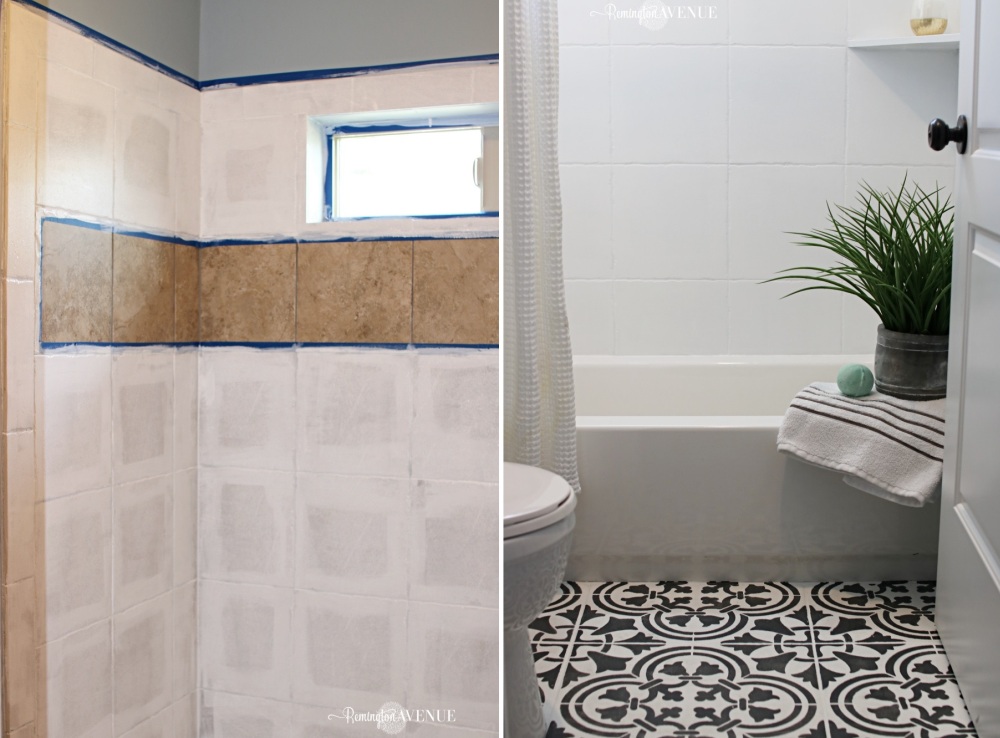
Introduction: Transforming Your Shower with Paint
The shower is a focal point in any bathroom, and updating its appearance can dramatically enhance the overall aesthetic of the space. While replacing old or outdated tiles can be costly and time-consuming, painting shower tiles offers a cost-effective alternative that can achieve equally stunning results. In this comprehensive guide, we’ll explore the process of painting shower tiles, providing tips and techniques to help you achieve a fresh and vibrant look without breaking the bank.
Assessing Your Tiles: Preparing for the Transformation
Before diving into the painting process, it’s essential to assess the condition of your shower tiles and ensure they are suitable for painting. Here’s what you need to consider:
- Tile Material: Determine the material of your shower tiles, as certain materials may require specific preparation or priming techniques. Common tile materials include ceramic, porcelain, and natural stone.
- Surface Condition: Inspect the tiles for any cracks, chips, or loose grout. Minor surface imperfections can typically be addressed with proper cleaning and preparation, but more significant damage may require repairs before painting.
- Cleaning and Prepping: Thoroughly clean the tiles with a mild detergent and scrub brush to remove any dirt, soap scum, or mildew. Rinse the tiles thoroughly with water and allow them to dry completely before proceeding.
Choosing the Right Paint: Selecting the Perfect Color and Type
Selecting the right paint is crucial for achieving a durable and attractive finish on your shower tiles. Consider the following factors when choosing paint for your project:
- Paint Type: Opt for a high-quality, waterproof paint specifically formulated for use in high-moisture environments such as showers. Epoxy, acrylic, or latex-based paints are excellent choices for painting shower tiles.
- Color Selection: Choose a paint color that complements the existing color scheme of your bathroom and reflects your personal style. Lighter shades can help brighten up the space and create a sense of openness, while bold colors can make a statement and add personality to your shower.
- Finish: Select a paint finish that suits your preferences and maintenance requirements. Glossy finishes offer a sleek, reflective surface that is easy to clean but may show imperfections more readily, while matte or satin finishes provide a softer, more subtle appearance.

Prepping the Surface: Essential Steps for Success
Proper preparation is key to achieving a smooth and long-lasting finish when painting shower tiles. Follow these essential steps to prep the surface effectively:
- Sand the Tiles: Use fine-grit sandpaper to lightly sand the surface of the tiles, creating a slightly rough texture that will help the paint adhere better. Be sure to sand evenly and thoroughly, paying special attention to any glossy or smooth areas.
- Clean and Degrease: Once the tiles are sanded, clean them again with a degreasing cleaner to remove any remaining dirt, oils, or residues. This step is crucial for ensuring proper paint adhesion and a flawless finish.
- Masking and Protecting: Use painter’s tape to mask off any areas you don’t want to paint, such as fixtures, hardware, or surrounding surfaces. Cover the shower floor and any adjacent walls with drop cloths or plastic sheeting to protect them from paint splatters.
Application Techniques: Achieving Professional Results
Now that your shower tiles are prepped and ready, it’s time to apply the paint. Follow these techniques for professional-quality results:
- Priming the Surface: Apply a coat of primer specifically formulated for use on tiles using a brush or roller. Primer helps seal the surface and provides a smooth, uniform base for the paint to adhere to. Allow the primer to dry completely before proceeding.
- Painting the Tiles: Once the primer is dry, apply the paint evenly to the tiles using a brush or roller. Work in small sections, overlapping each stroke slightly to ensure complete coverage. Be sure to follow the manufacturer’s instructions regarding drying times and recoat intervals.
- Adding Multiple Coats: Depending on the desired color and coverage, you may need to apply multiple coats of paint. Allow each coat to dry completely before applying the next, and use light, even strokes to minimize brush marks or roller lines.
Finishing Touches: Sealing and Protecting Your Work
After painting your shower tiles, it’s essential to seal and protect the finish to ensure its longevity and durability. Here’s what you need to do:
- Applying a Sealant: Once the paint is fully dry, apply a clear, waterproof sealant over the tiles to protect the finish from moisture and wear. Choose a sealant specifically designed for use in wet areas such as showers for optimal results.
- Curing Time: Allow the sealant to cure fully according to the manufacturer’s instructions before using the shower. This typically involves avoiding contact with water or moisture for a specified period to allow the sealant to bond properly.
- Regular Maintenance: To maintain the appearance of your painted shower tiles, clean them regularly with a mild detergent and soft sponge or cloth. Avoid abrasive cleaners or scrubbing too vigorously, as this could damage the paint finish.
Addressing Common Concerns: Tips for Longevity and Maintenance
While painting shower tiles can provide a beautiful and cost-effective update to your bathroom, it’s essential to address common concerns to ensure the longevity and maintenance of your newly painted surfaces:
- Grout Maintenance: Keep an eye on the condition of the grout between your painted tiles. Over time, grout may become discolored or cracked, detracting from the overall appearance of the shower. Consider resealing or regrouting the tiles periodically to maintain a fresh and cohesive look.
- Avoiding Harsh Cleaners: While it’s crucial to keep your shower tiles clean, avoid using harsh chemical cleaners or abrasive scrubbing pads, as these can damage the paint finish and degrade the sealant over time. Stick to mild detergents and non-abrasive cleaning tools to preserve the integrity of the painted surface.
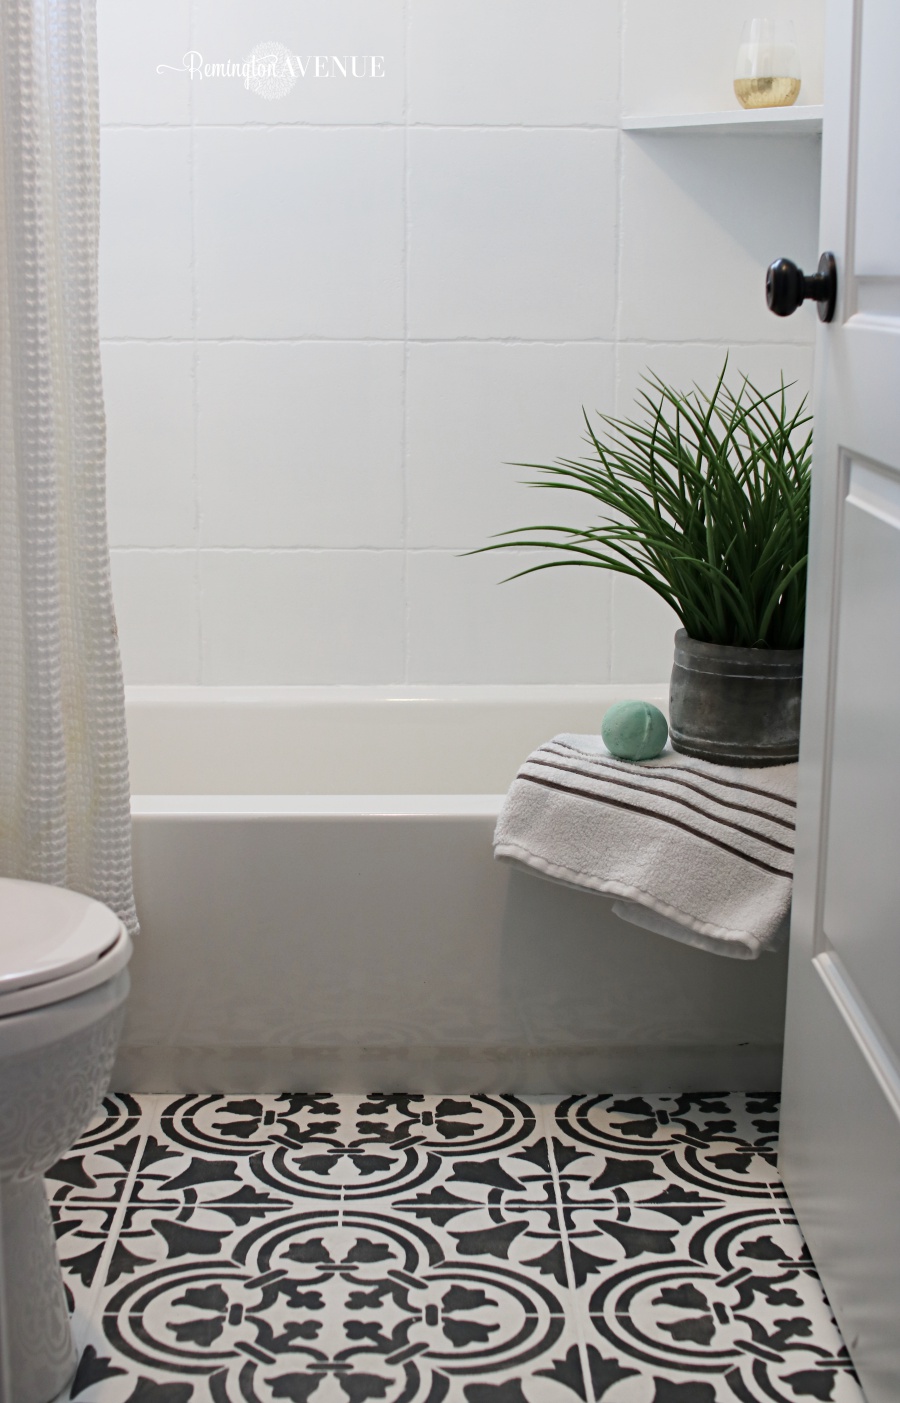
Conclusion: Revitalize Your Shower with Painted Tiles
Painting shower tiles offers a budget-friendly and creative way to update your bathroom and breathe new life into your space. By following the tips and techniques outlined in this guide, you can achieve professional-quality results that will transform your shower into a stylish and inviting oasis. So why settle for dull and outdated tiles when you can unleash your creativity and add a splash of color to your shower? With a little bit of effort and the right materials, you can enjoy a fresh and vibrant look that will rejuvenate your bathroom for years to come.