Assessing Your Current Kitchen Sink Situation
Before you embark on replacing your kitchen sink, it’s critical to evaluate the current state of your sink. Taking the time to assess your kitchen sink situation will guide you to make informed decisions.
- Check for Damage: Look for cracks, leaks, or rust on your sink. Damage can signal that it’s time for a replacement.
- Assess the Size: Make sure you know the dimensions of your current sink. This is crucial for finding a suitable replacement.
- Evaluate the Style: Consider if your sink’s style fits your kitchen’s aesthetic. You might want an upgrade to match modern trends.
- Examine Functional Needs: Think about your sink usage. Do you need more basins or a deeper sink for your tasks?
- Consider the Faucet: Remember the faucet when replacing kitchen sink. Will you reuse it or get a new one?
- Inspect Plumbing: Check the pipes and garbage disposal under the sink. If they are worn, plan to replace them too.
Doing a thorough assessment helps prevent surprises during installation. Keep your findings in mind as we continue with the next steps for replacing your kitchen sink.
Preparing for the Installation
Before removing your old kitchen sink, preparation is key. Here are some steps to prepare for the installation of your new sink:
- Clear the Space: Empty the sink and the cabinet underneath. This gives you room to work.
- Gather Tools and Materials: Make sure you have all the tools and materials you need for replacing kitchen sink. Check the manufacturer’s instructions for any specific requirements.
- Shut Off the Water: Locate the valves under the sink and turn off the water supply. This step is crucial to prevent any spills or leaks.
- Disconnect Plumbing: Carefully disconnect the plumbing fixtures. This includes the water supply lines, drainpipe, and if present, the garbage disposal unit.
- Protect Your Area: Lay down a cloth or cardboard to protect your countertop and floor from scratches and debris.
- Take Measurements: Double-check the measurements of your current sink to ensure the new sink will fit. Consider any adjustments you might need to make.
Preparing correctly will streamline the replacing kitchen sink process. It ensures safety and efficiency, reducing the risk of errors or injuries.
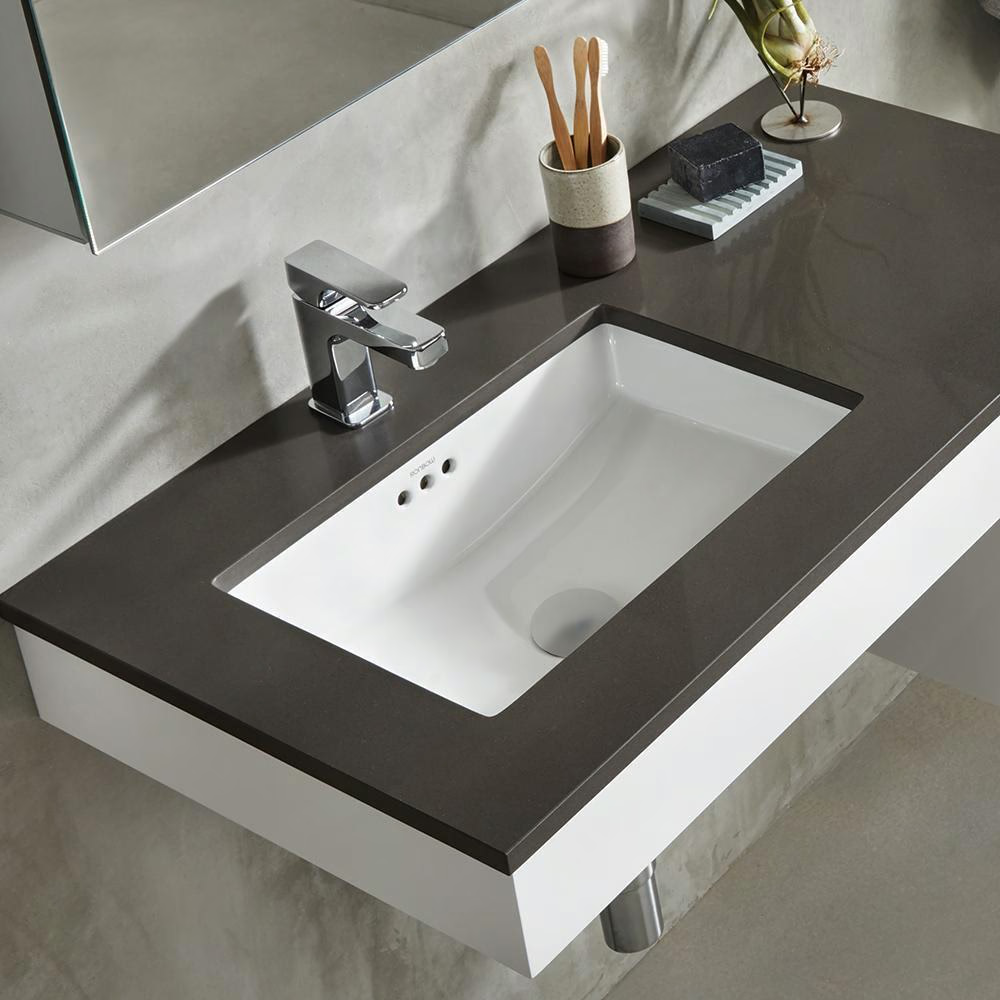
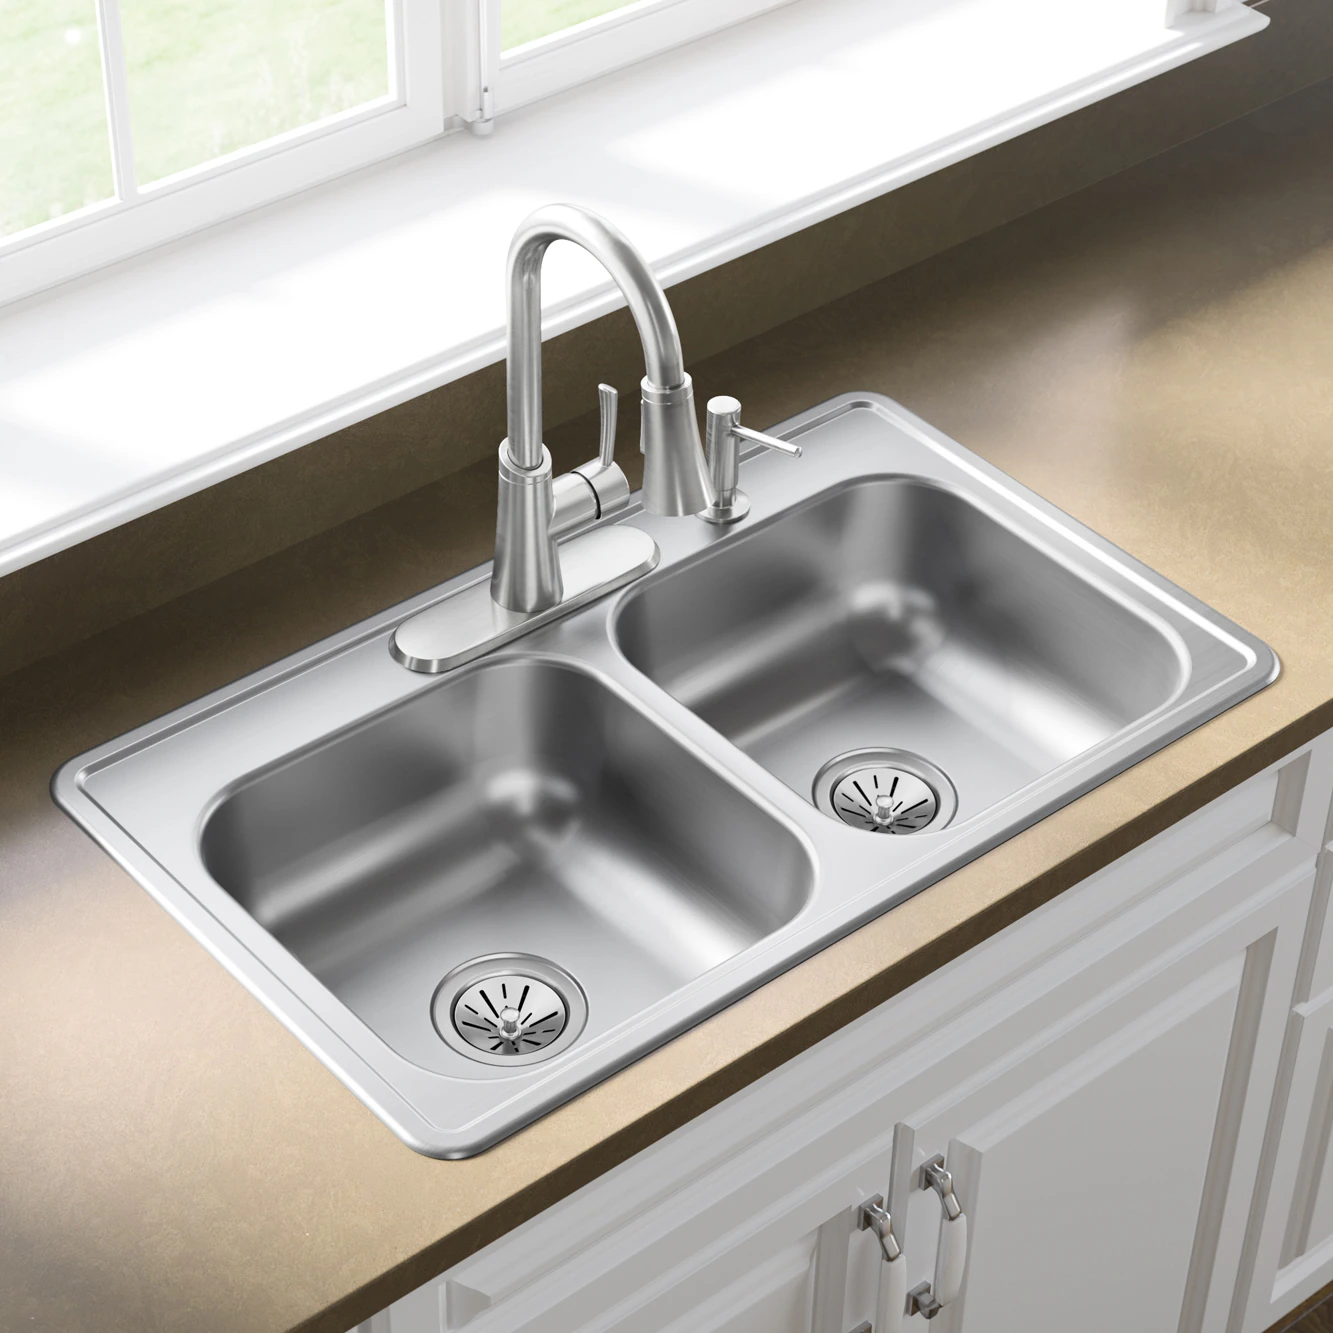
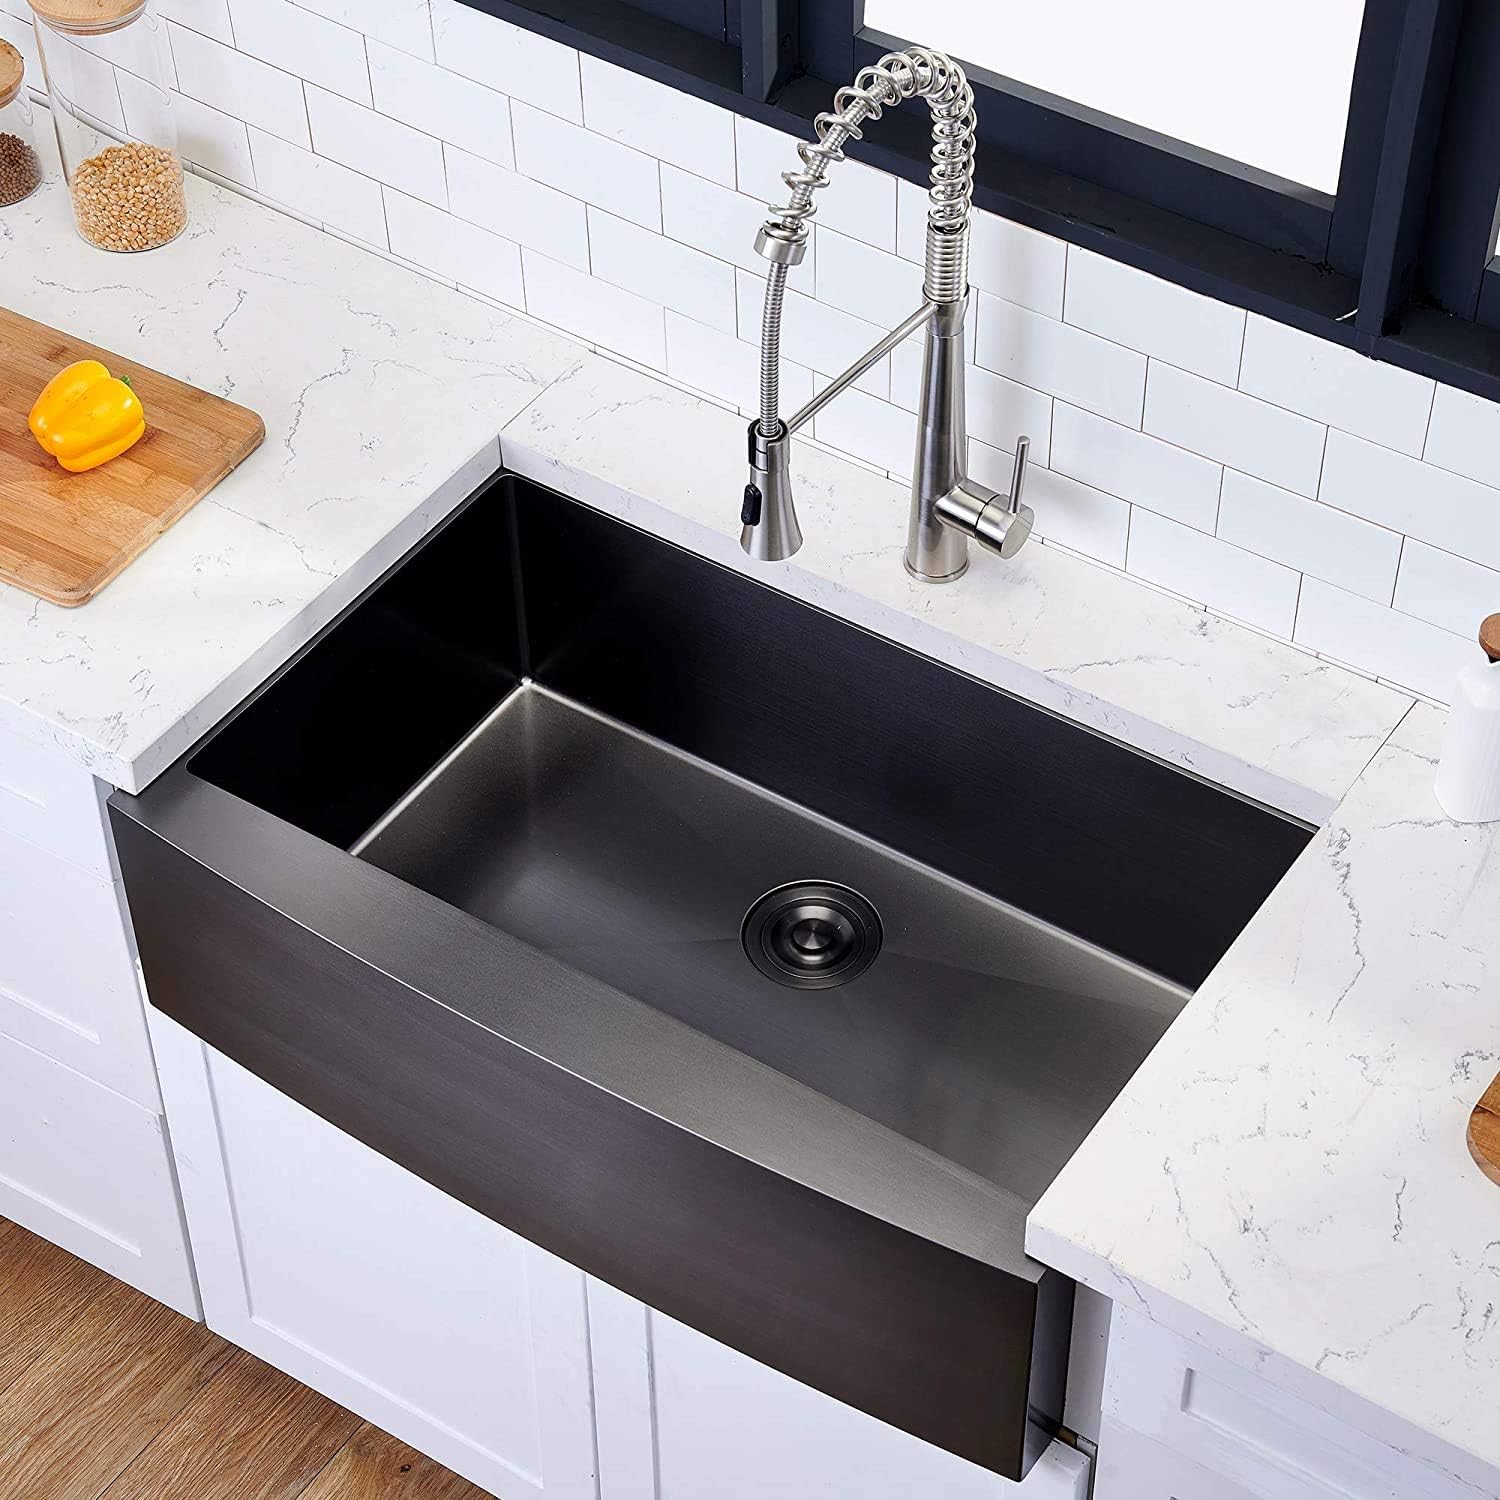
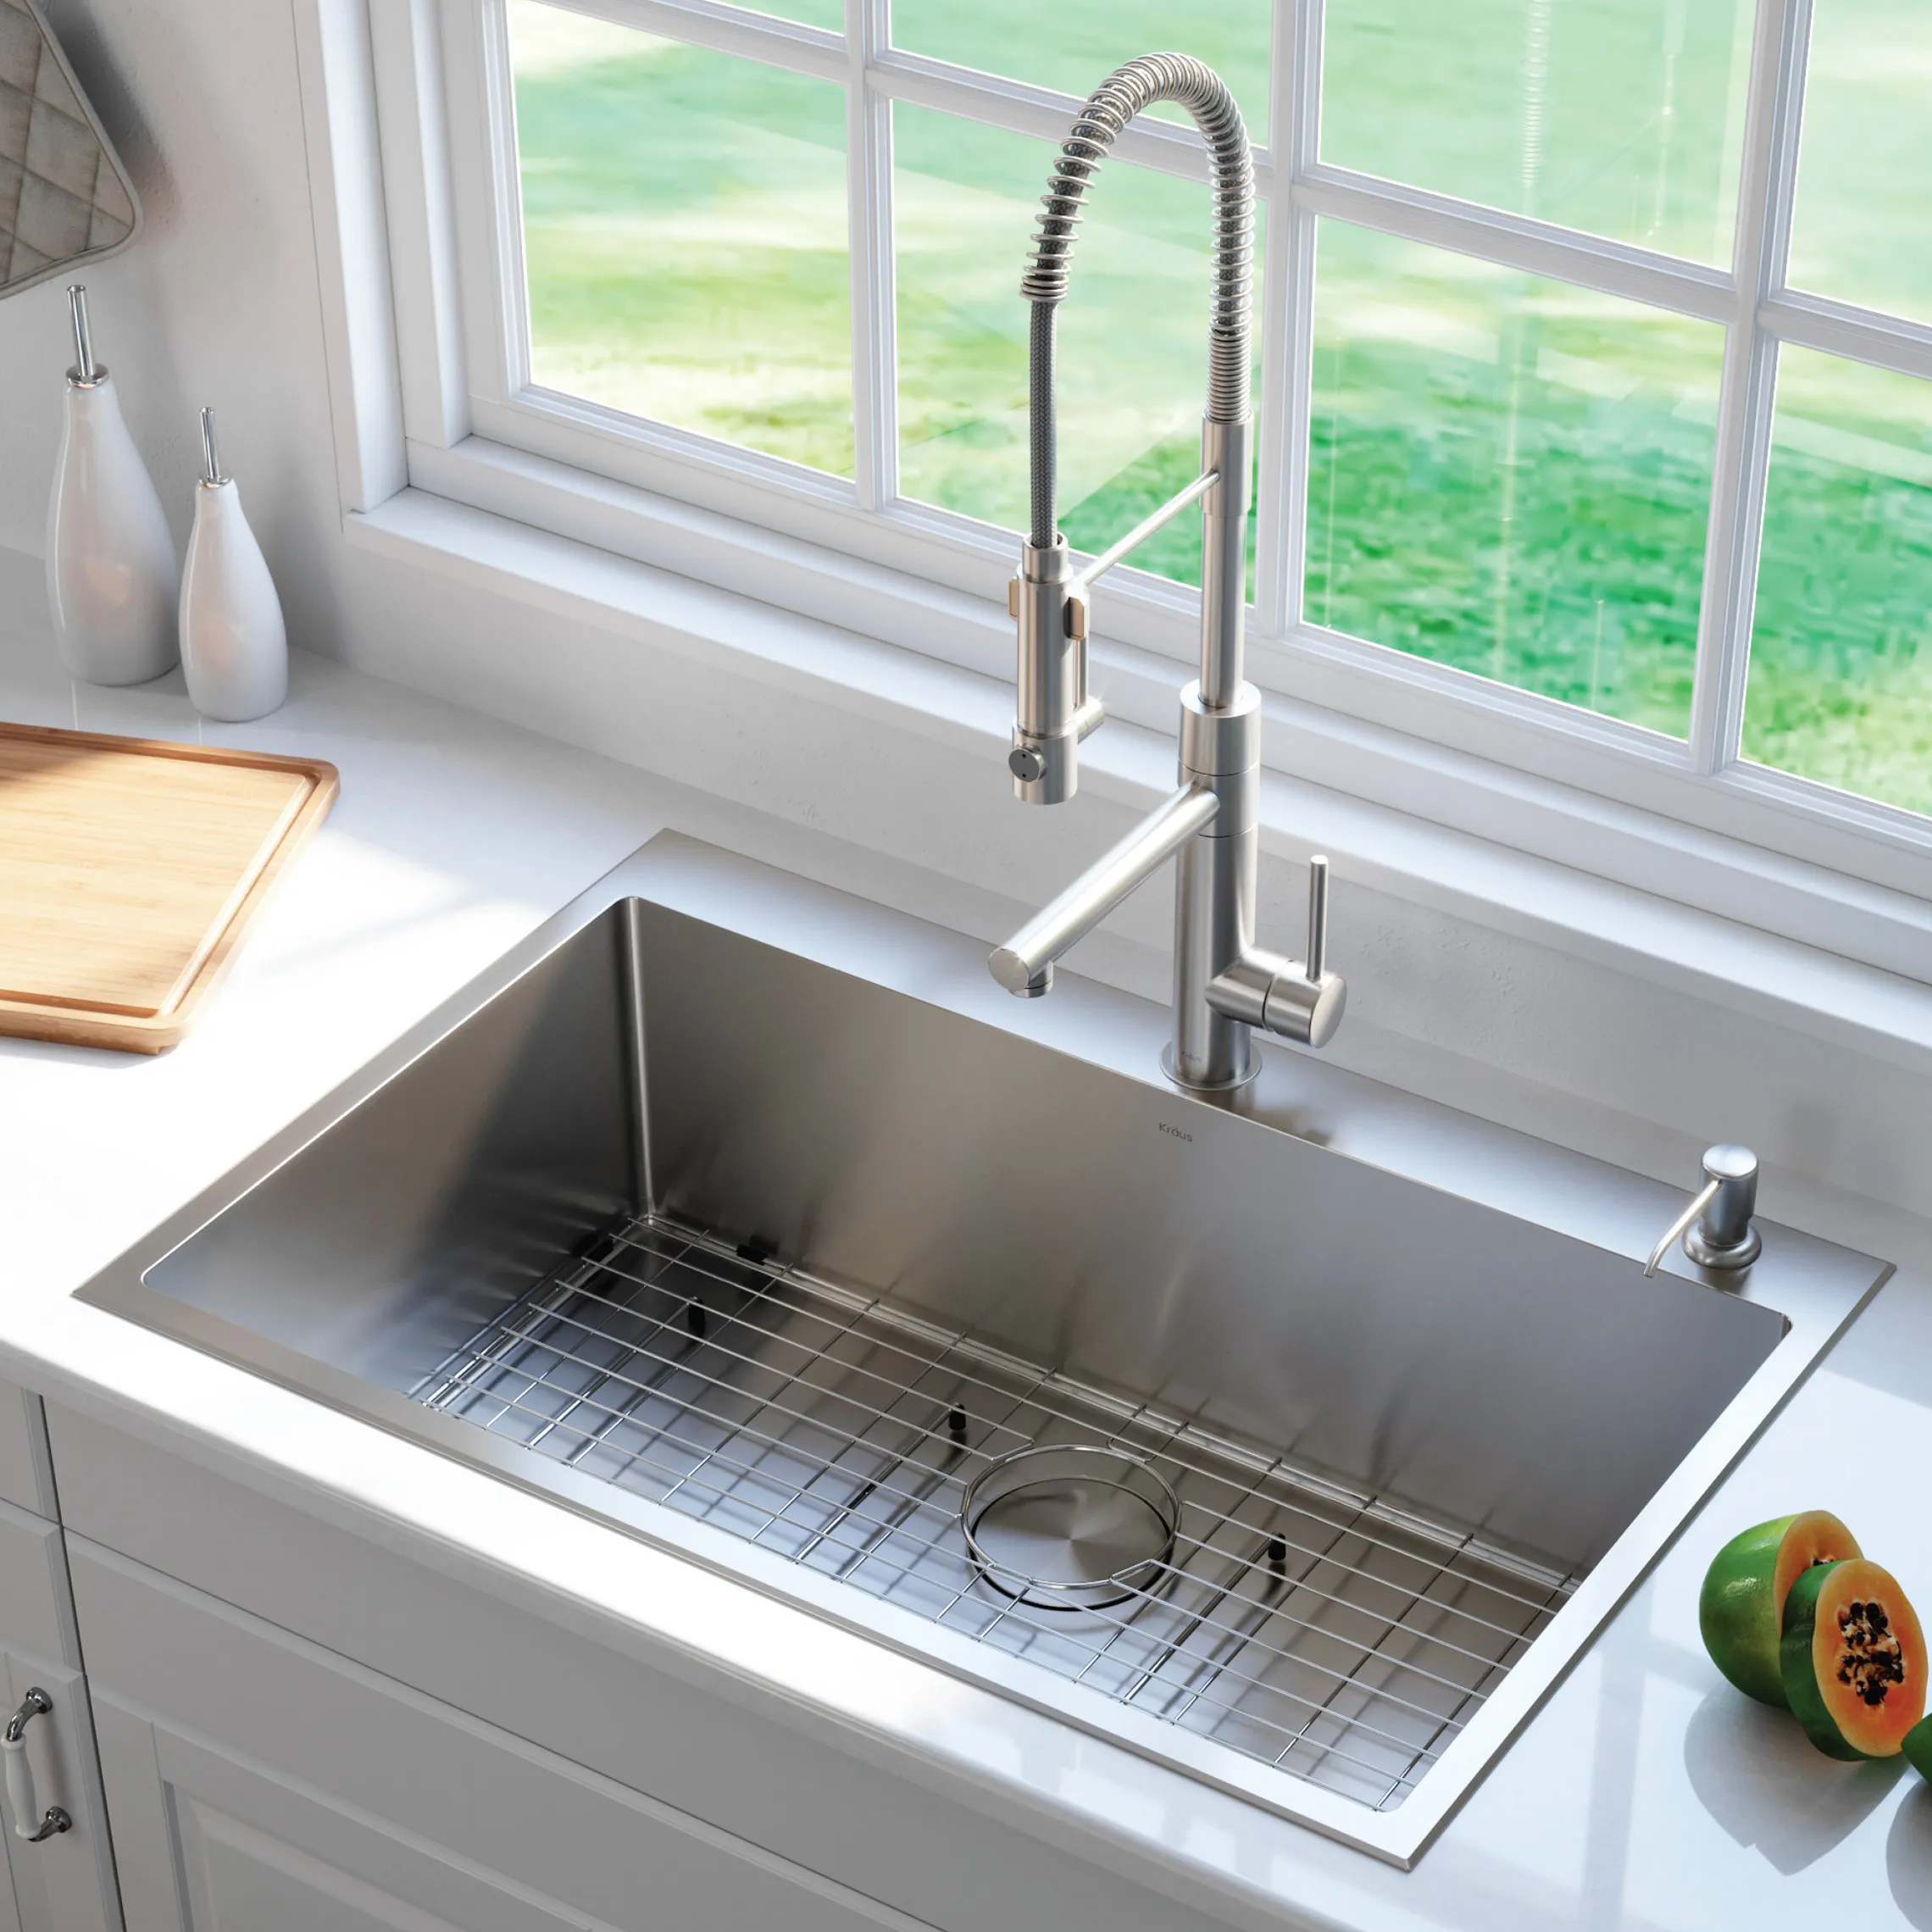
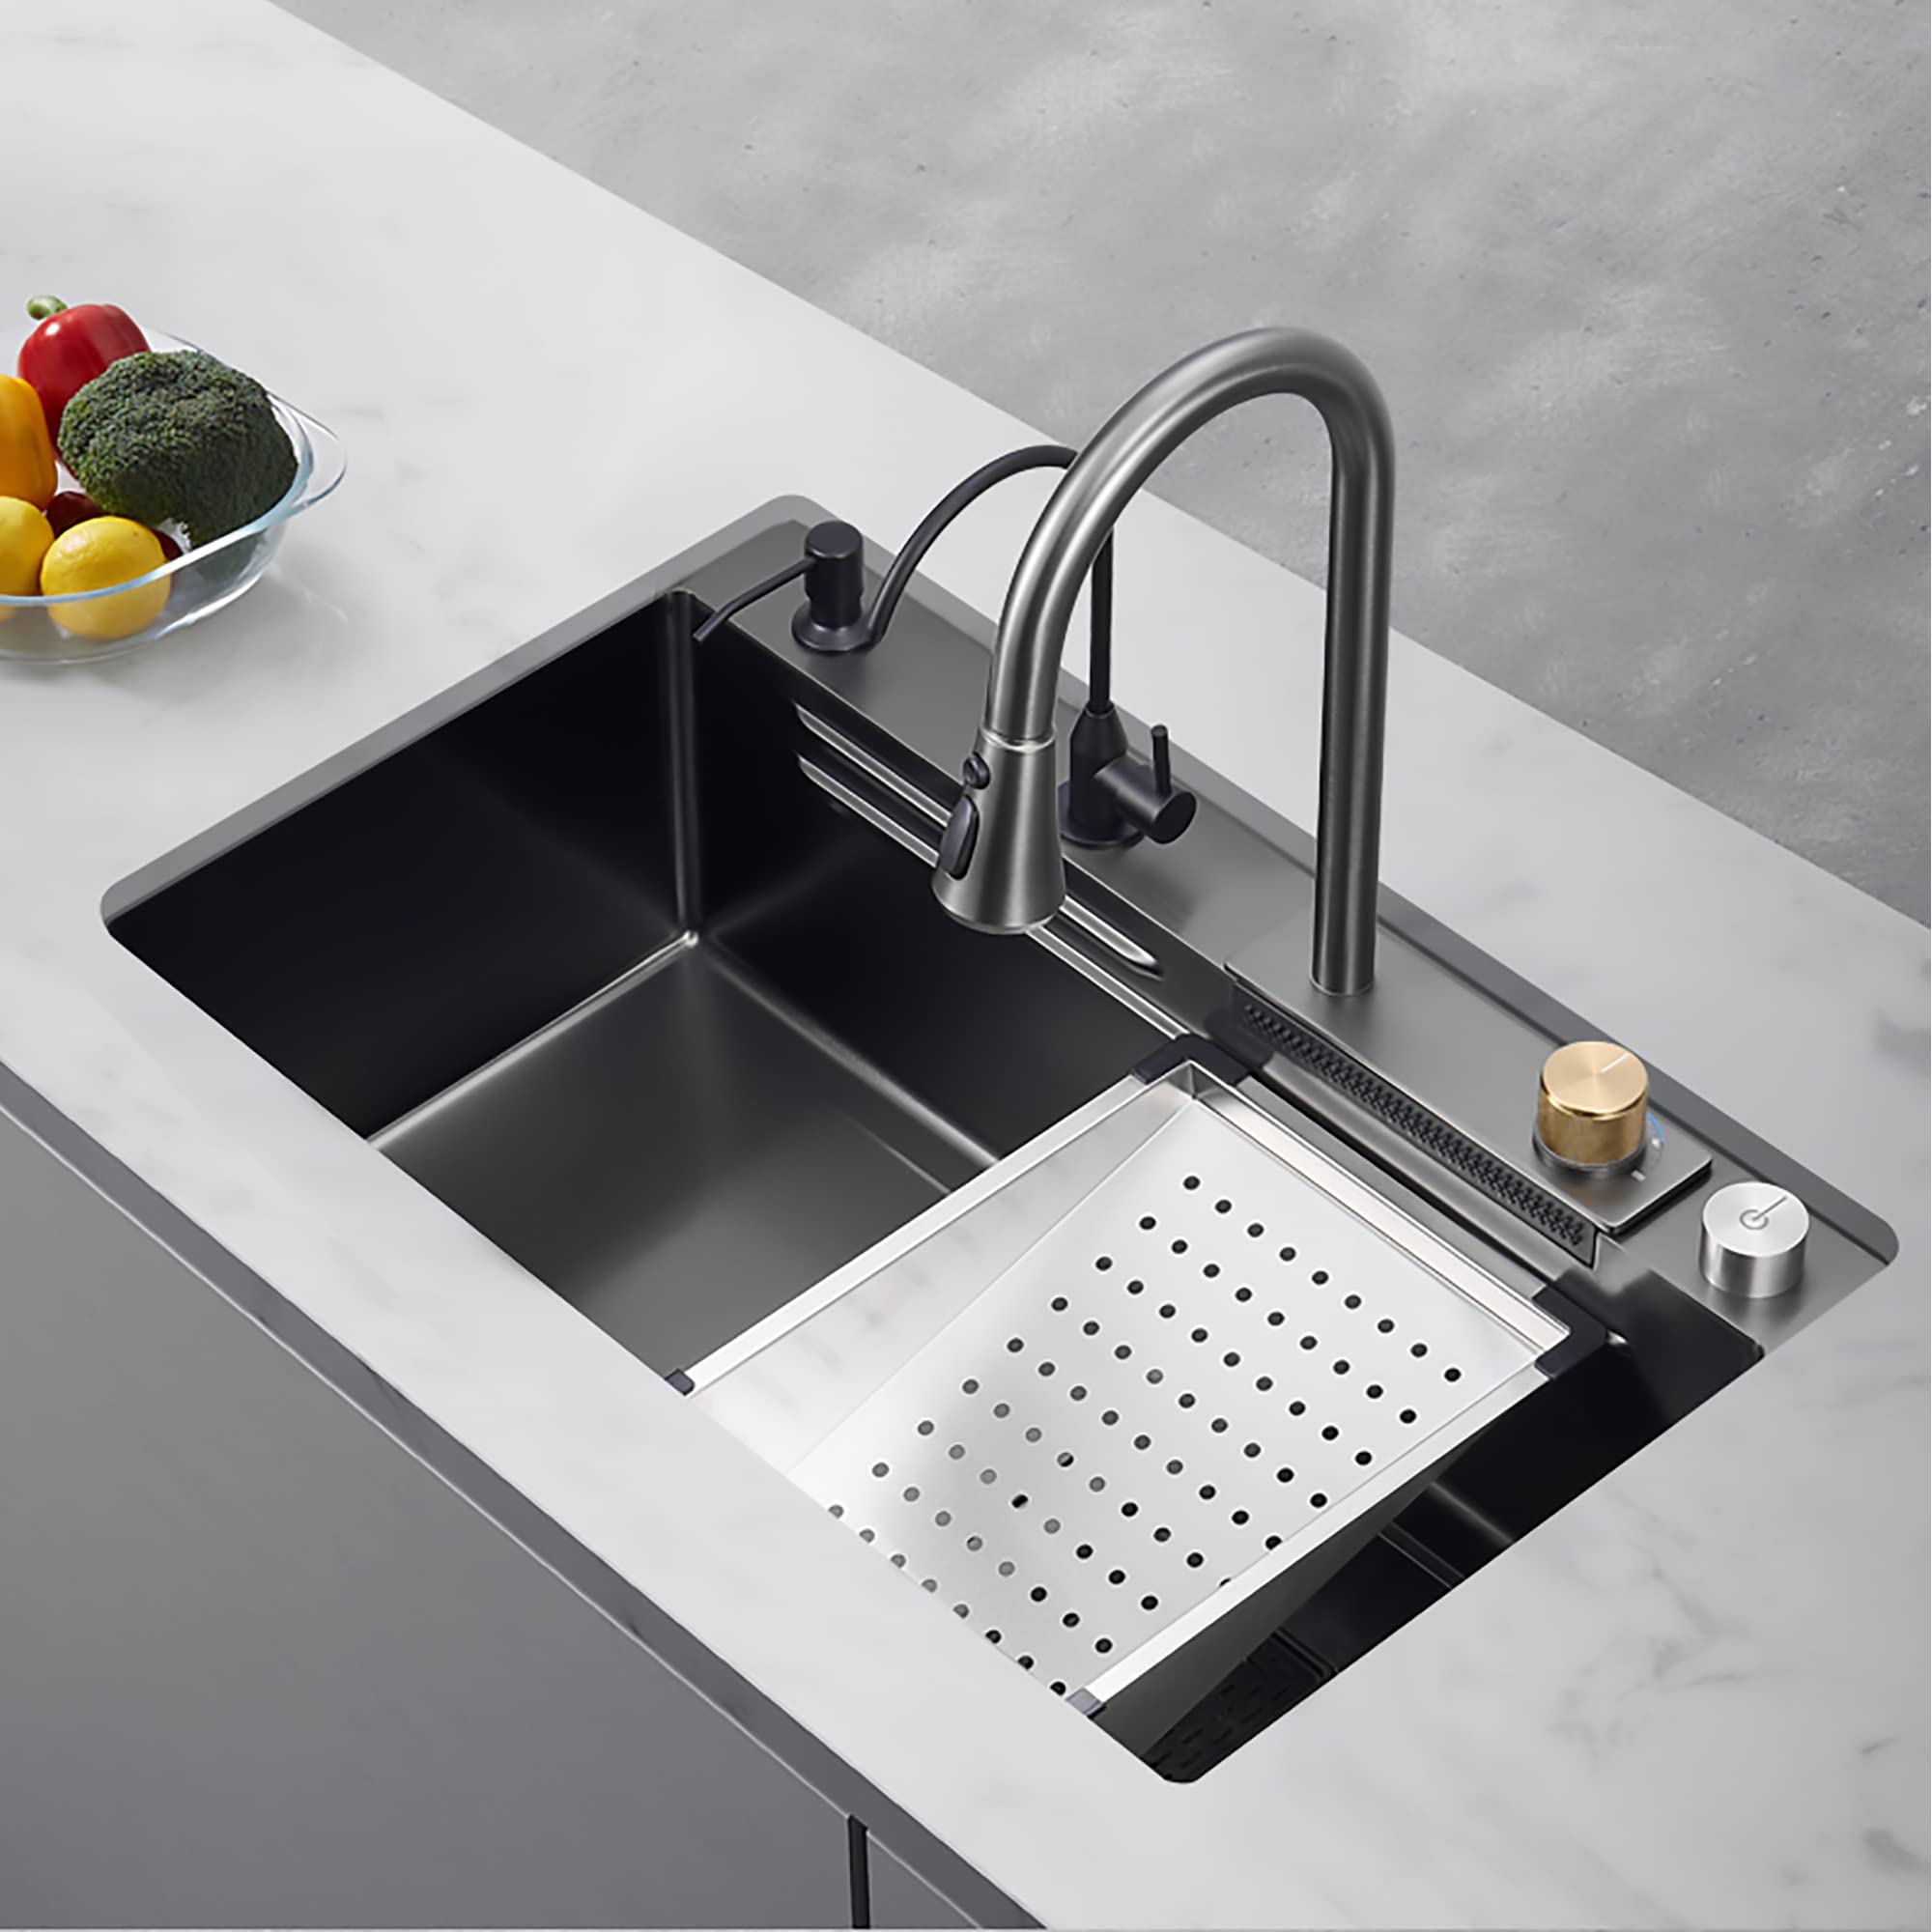
Choosing the Right Kitchen Sink
Choosing the right kitchen sink is a critical step in your replacement project. It determines not only functionality but also the aesthetic appeal of your kitchen. Here are some points to consider when selecting a new sink:
- Material Matters: Sinks come in various materials like stainless steel, granite composite, and cast iron. Each has its pros and cons.
- Sink Size: Make sure the new sink fits the existing space or that you’re willing to modify the countertop.
- Number of Basins: Decide if you prefer a single, double, or triple basin sink, based on your usage.
- Mounting Style: You can choose from top-mount, undermount, or flush-mount sinks. Each integrates differently with your countertop.
- Faucet Compatibility: The new sink should align with the faucet and any accessories you plan to use.
- Aesthetic Appeal: The sink’s design should complement your kitchen’s style and enhance its overall look.
- Budget: Consider the cost of the sink along with installation expenses. Stick to a sink that fits your budget.
Take your time to research and find the perfect sink that balances function, style, and cost. Remember, the right kitchen sink can be a game-changer for your daily kitchen tasks and for the overall appeal of your home’s heart – the kitchen.
 Tools and Materials Needed for Sink Replacement
Reaching the point of actually replacing your kitchen sink means having the right tools and materials on hand. Make sure you gather everything before you start to ensure a smooth process.
- Sink and Faucet: Of course, you’ll need the new sink and faucet you’ve chosen according to your preferences.
- Sealant: A high-quality sealant is essential for a watertight seal between the sink and countertop.
- Plumber’s Putty: This helps create a secure seal around the drain assembly and faucet.
- Adjustable Wrench: This will aid in connecting and disconnecting water supply lines.
- Pipe Wrench: You may need this to tighten or loosen plumbing connections.
- Screwdriver Set: Screws are commonly used in sink attachments, so a set of screwdrivers is a must.
- Hacksaw: In some cases, cutting pipes or other hardware is necessary.
- Tape Measure: Measuring is crucial for making sure the new sink fits your space.
- Plumbing Tape: This tape helps prevent leaks in threaded connections.
- Safety Glasses and Gloves: Always protect your hands and eyes during the replacement.
- Bucket: Keep a bucket nearby to catch any water when disconnecting the plumbing.
Check each item off your list as you gather them to avoid missing anything. Remember, quality tools can make the job easier and help ensure a successful sink replacement.
Step-by-Step Installation Process
Now that you have your tools and the right kitchen sink, let’s move ahead with the installation. Here is a simple, step-by-step guide to replacing your kitchen sink.
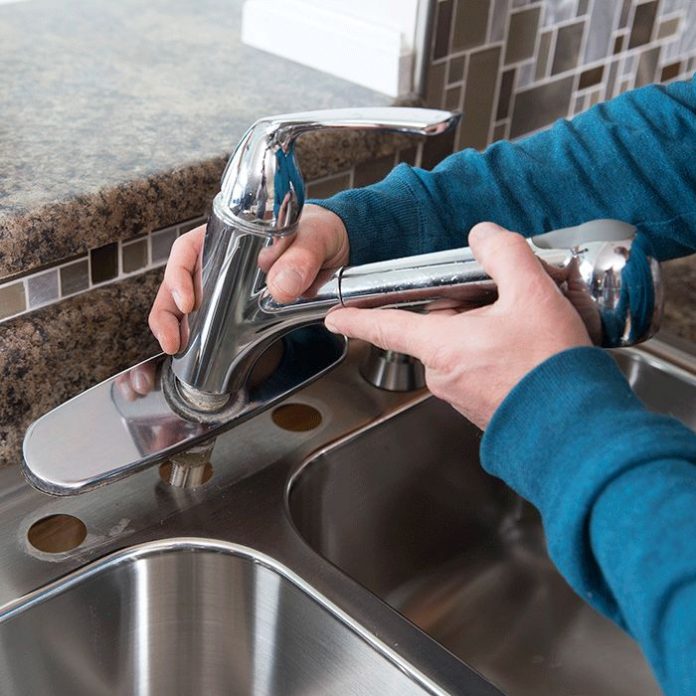
- Remove the Old Sink: Start by taking out the old sink. Use your wrenches to disconnect the water lines and remove the mounting clips under the sink. Gently lift the sink out of the counter.
- Clean the Surface: Once you remove the old sink, clean the countertop surface. Scrape away old sealant and debris.
- Set the New Sink: Carefully place the new sink into the hole. Check it fits well. If it doesn’t, alter the countertop hole as needed.
- Seal the Edges: Apply a bead of the quality sealant you collected around the edge of the sink. This helps create a waterproof seal.
- Secure the Sink: After setting the sink in its place, secure it with mounting clips. Tighten these clips to make sure the sink is steady.
- Connect the Faucet and Drain: Install the faucet and drain assembly onto the sink. Use plumber’s putty and the wrench to ensure a tight fit.
- Reconnect the Water Lines: Reattach the water supply lines to the faucet. Use plumbing tape and an adjustable wrench for a leak-free connection.
- Check for Leaks: Turn the water back on and check for any leaks. Do this before you finish up, so you can address any issues right away.
- Apply Finishing Touches: Clean any excess sealant or putty and do a final inspect of your work.
Following these steps will ensure you successfully replace your kitchen sink. Remember to always wear safety glasses and gloves to protect yourself during the installation process. If at any point you feel unsure, it’s wise to call a professional.
 Finishing Touches and Leak Prevention
Once you have your new kitchen sink installed, it’s time for the finishing touches and leak prevention. This step is key to ensure your sink not only looks great but also functions without issues. Here’s how you can wrap up the installation and safeguard your kitchen against leaks.
- Check Seals and Connections: Examine the seal around the sink. Make sure it’s even and there are no gaps. Check the water supply and drain connections again for tightness.
- Test the Faucet: Turn on the faucet and let the water run. Look for any drips around the faucet and handles. If you spot leaks, tighten the connections or add more plumber’s putty.
- Inspect the Drain: Fill the sink with water and watch the drain for leaks. A leak-free drain is crucial for a well-functioning sink.
- Clean Up the Area: Wipe away any excess sealant or putty. Keep the area under the sink clean and dry to easily spot future leaks.
- Do a Final Inspection: After the sealant has dried, do one last check. Ensure everything is secure and watertight.
Following these steps will help you finish the kitchen sink replacement neatly and efficiently. It will also reduce the chance of leaks, saving you time and money in the long run. Always stay vigilant and if you notice any water pooling, address it quickly to avoid damage.
Maintenance Tips for Your New Kitchen Sink
To keep your new kitchen sink in top condition, follow these straightforward maintenance tips:
- Regular Cleaning: Wipe your sink after each use to prevent water spots and stains.
- Avoid Harsh Chemicals: Steer clear of abrasive cleaners that can damage the sink’s surface.
- Check Faucets Regularly: Look for signs of drips or leaks around your faucet to catch issues early.
- Use Sink Protectors: Consider sink grids or mats to shield against scratches or dents.
- Clear Drains Often: Use a strainer to catch debris and clean the drain with baking soda and vinegar periodically.
- Polish if Needed: For sinks like stainless steel, apply a polish to maintain shine.
- Inspect Seals Annually: Ensure the sealant around your sink remains intact to prevent leaks.
Remember, taking care of your kitchen sink is an ongoing task. A well-maintained sink can last for years and continue to be a valuable part of your kitchen.
When to Call a Professional for Sink Replacement
While many steps in replacing kitchen sink can be DIY, situations arise where professional help is needed. Recognizing when to call an expert is important for a successful installation. Here are some signs that indicate it’s time to contact a professional:
- Complex Plumbing: If your home has complex or outdated plumbing, a professional can ensure proper installation.
- Lack of Tools: If you don’t have the necessary tools or are unsure about using them, professionals come equipped and experienced.
- Countertop Cutting: When your new sink requires enlarging the countertop hole, professionals can cut stone or solid surfaces without damage.
- Persistent Leaks: If you’ve followed all steps and still notice leaks, it might be time for a plumber’s expertise.
- Installation Uncertainty: If you feel uncertain at any step or unable to follow instructions, calling a professional can prevent costly mistakes.
- Time Constraints: When you’re short on time, a professional can complete the job quickly and efficiently.
Calling a professional does not mean you’ve failed; it’s a smart choice to ensure a safe and precise sink installation. Keep their contact info handy, in case you encounter issues during your replacing kitchen sink project.
 Decorating Around Your New Kitchen Sink
Choosing Complementary Faucets and Fixtures
The right faucet and fixtures can enhance the beauty and functionality of your new kitchen sink:
- Match Styles: Choose faucets and fixtures that complement the style of your sink and overall kitchen design, whether it’s modern, traditional, or farmhouse.
- Consider Features: Select faucets with features like pull-down sprayers, touchless controls, or water-saving technologies to improve usability and efficiency.
- Coordinate Finishes: Ensure that the finishes of your faucets and fixtures coordinate with other hardware in your kitchen, such as cabinet handles and knobs, for a cohesive look.
Adding Practical Accessories
Incorporate practical accessories to maximize the functionality and organization around your kitchen sink:
- Sink Organizers: Use organizers or caddies to keep cleaning supplies, sponges, and utensils neatly arranged and easily accessible.
- Under-Sink Storage: Install shelves, racks, or pull-out drawers under the sink to optimize space and keep essentials organized.
- Basin Mats and Trays: Place basin mats or trays to catch drips and protect your countertop from water damage, ensuring a clean and tidy kitchen environment.
Enhancing Lighting Around the Sink
Proper lighting can highlight your kitchen sink and improve visibility for daily tasks:
- Under-Cabinet Lighting: Install under-cabinet lights to illuminate the sink area, providing adequate brightness for cooking and cleaning.
- Pendant Lights: Hang pendant lights above the sink to add a decorative element and enhance the overall aesthetic of your kitchen.
- Natural Light: Maximize natural light by positioning the sink near windows or using sheer curtains to allow ample daylight into the space.
Environmental Considerations When Replacing Kitchen Sink
Choosing Eco-Friendly Materials
Opting for eco-friendly materials when replacing kitchen sink supports sustainable living:
- Recycled Materials: Select sinks made from recycled materials like stainless steel or composite stone to reduce environmental impact.
- Low-VOC Finishes: Choose sinks with low-VOC (volatile organic compounds) finishes to minimize indoor air pollution and create a healthier kitchen environment.
- Durable Designs: Invest in durable sink materials that require less frequent replacement, reducing waste and conserving resources.
Water Conservation Features
Incorporate water conservation features to make your new kitchen sink more sustainable:
- Low-Flow Faucets: Install low-flow faucets to reduce water usage without compromising performance, helping to conserve water and lower utility bills.
- Efficient Drainage Systems: Choose sinks with efficient drainage systems to prevent water waste and promote faster water flow, enhancing overall kitchen efficiency.
- Smart Plumbing Solutions: Implement smart plumbing solutions such as sensor-activated faucets or integrated water filtration systems to further enhance water conservation efforts.
Reducing Waste During Replacement
Minimize waste and environmental impact during the replacement process by following these tips:
- Reuse Components: Reuse existing plumbing components and fixtures when possible, reducing the need for new materials and minimizing waste.
- Proper Disposal: Dispose of old sinks and related materials responsibly by recycling or donating, ensuring that they do not end up in landfills.
- Minimize Packaging Waste: Choose sinks with minimal packaging or packaging made from recyclable materials to reduce overall waste generated during the replacement process.
 Final Thoughts
Replacing kitchen sink is a rewarding project that can significantly enhance the functionality, style, and value of your kitchen. By carefully selecting the right sink, planning the replacement process, and maintaining your new installation, you can enjoy a beautifully updated kitchen that meets your every need. Whether you choose a sleek stainless steel sink, a charming farmhouse model, or an innovative composite design, investing in a new kitchen sink is a worthwhile endeavor that brings lasting benefits to your home.
In conclusion, embarking on the journey of replacing kitchen sink opens up opportunities to refresh your kitchen’s look, improve daily operations, and contribute to a more sustainable and organized living space. Embrace the process with confidence, and let your new kitchen sink be the centerpiece of your revamped culinary haven.