The Rise of Shiplap in Bathroom Design
Shiplap bathroom walls have become a trend in home interiors, especially within modern bathrooms. This surge is due to shiplap’s ability to add texture, character, and a sense of rustic charm. As homeowners look for unique ways to upgrade their spaces, shiplap provides an ideal solution.
One reason for shiplap’s rise in popularity is its versatility. Shiplap can suit various design aesthetics, from classic to contemporary. It can be painted to match any color scheme, ensuring it complements the overall design of the bathroom. Additionally, shiplap installations can range from full walls to accent panels, providing plenty of design flexibility.
Another factor contributing to shiplap’s popularity in bathroom design is its perceived value. When installed correctly, shiplap can increase a home’s attractiveness to potential buyers, offering a return on investment for homeowners considering future sales.
Social media and home improvement shows have also played a significant role in the growth of shiplap as a bathroom feature. Influencers often showcase shiplap walls, inspiring their viewers to embrace this trend. Home decor enthusiasts share their DIY projects, further popularizing the idea and displaying the transformative power of shiplap in bathroom design.
In conclusion, the rise of shiplap in bathroom design reflects a broader trend of seeking functional and stylish home improvements. Its adaptable nature makes it a winning feature for those looking to modernize their bathroom with a feature that’s visually appealing and offers lasting appeal.
Essential Tips for Installing Shiplap in Your Bathroom
When adding a shiplap bathroom wall, it’s crucial to get the installation right. Here are essential tips that will help ensure your shiplap looks great and lasts long:
- Measure Accurately: Start by measuring your bathroom walls. This will determine how much shiplap you’ll need.
- Choose the Right Wood: Opt for moisture-resistant wood or material. This is vital in a humid bathroom environment.
- Prep the Walls: Clean and smooth the surface where you’ll install the shiplap. This step is key for proper adhesion.
- Consider the Layout: Decide if you want horizontal or vertical shiplap. Each direction can make the room look larger or taller.
- Leave Expansion Gaps: Wood expands with humidity. Leave small gaps between the boards to allow for this natural movement.
- Use the Right Tools: Invest in a good-quality saw, level, and nail gun for a smooth installation process.
- Finish Correctly: Use a high-quality paint suitable for bathrooms. Proper finishing protects against moisture damage.
- Seal the Edges: To keep moisture out, seal the edges of your shiplap bathroom wall with caulk.
Following these steps will help create a beautiful and durable shiplap bathroom wall that enhances your home’s value and appeal.
Choosing the Right Material for Shiplap Walls
Selecting the right material for your shiplap bathroom wall is crucial. Here’s what to consider:
- Moisture Resistance: In a bathroom, moisture is a constant concern. So, opt for materials like cedar, teak, or a PVC composite that can resist humidity without warping or swelling. These options prevent moisture from seeping in, extending the longevity of your walls.
- Durability and Strength: Your shiplap should withstand the test of time. Look for wood that’s hard and sturdy or engineered alternatives that promise durability. A strong shiplap material ensures that your bathroom walls stay intact.
- Ease of Maintenance: Choose materials that are easy to clean and maintain. Painted shiplap will require touch-ups; however, some natural woods can be left unfinished for a more rustic look while still being easy to maintain.
- Aesthetic Match: The material should complement the rest of your bathroom’s style. If you’re going for a more polished look, painted PVC might be your match. For a classic, warm touch, natural woods like pine could be perfect.
- Environmental Considerations: If sustainability is important to you, consider eco-friendly materials. Reclaimed wood, bamboo, or sustainably sourced wood could be great eco-conscious choices for your shiplap bathroom wall.
- Budget: Material costs can vary widely. Set your budget first and then explore the options within your range. Remember, investing a bit more initially might save you money in the long run on maintenance and replacements.
Incorporate these considerations into your decision-making process for a shiplap bathroom wall that’s not just stylish but practical and enduring as well.
Color Schemes and Painting Ideas for Shiplap
Selecting the right color scheme for your shiplap bathroom wall can make a big difference. Colors set the tone of the room and influence the overall ambiance. Here are some ideas to inspire the perfect palette for your shiplap walls:
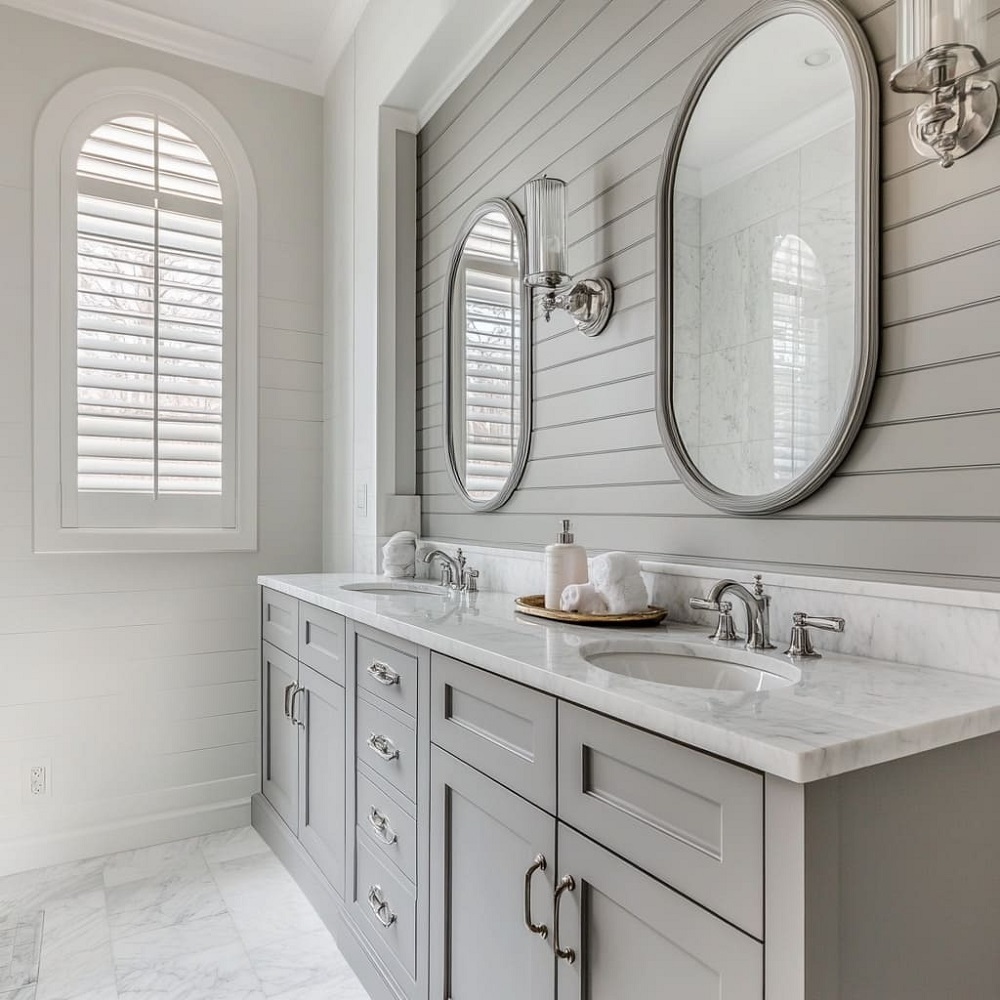
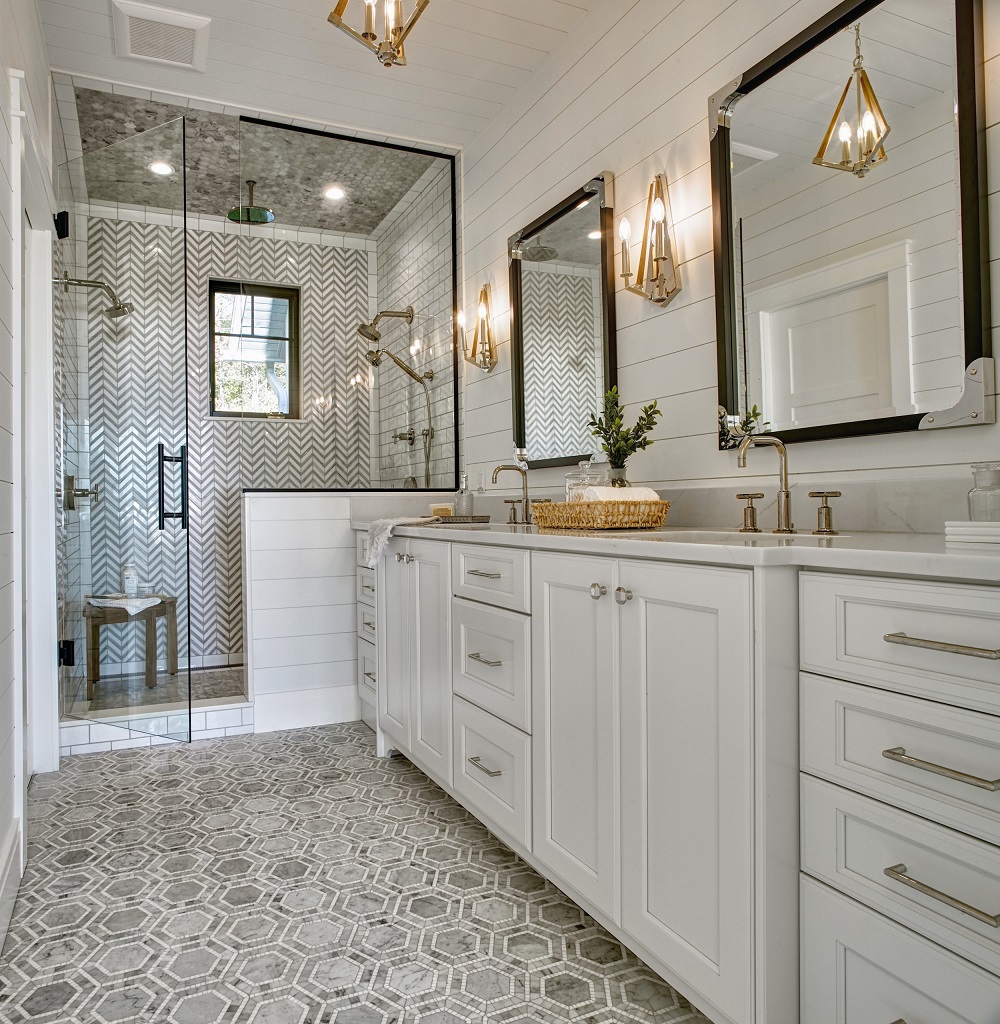
- Go Neutral: Neutrals are timeless. Whites, grays, and beiges can make your bathroom feel spacious and clean. They allow for versatility in decor changes too.
- Embrace the Dark Side: Dark hues like navy blue or charcoal can add a touch of sophistication. They work well if you have adequate lighting in your bathroom.
- Play with Pastels: Soft pastel colors bring a gentle, calming effect to your space. Think pale pinks, light blues, and mint greens for a serene atmosphere.
- Bold and Beautiful: If you’re daring, go for a bold color. A vibrant teal or sunny yellow can bring energy and a modern edge to your bathroom.
- Coastal Vibes: To create a beach-inspired look, choose shades of blue and sand. This scheme works well with natural wood textures in a shiplap bathroom wall.
- Monochrome Magic: A monochrome palette creates a chic, cohesive look. Use different shades of the same color to add depth and interest.
- Earth Tones: Earthy tones like olive green or terracotta can evoke a nature-inspired aesthetic. They’re great for a warm, inviting space with a shiplap wall.
When painting your shiplap, use a paint that’s formulated for bathrooms. It should resist mold and moisture to protect the wood. Always prep your shiplap for painting by cleaning it well and priming if necessary. Finish with a top coat that seals and shields the surface from the humid bathroom environment.
Shiplap Maintenance and Upkeep in Humid Environments
Maintaining your shiplap bathroom wall in a humid environment is key to its longevity and appearance. Here are some tips to keep your shiplap in top condition:
- Regular Cleaning: Wipe down your shiplap regularly with a damp cloth. Use mild soaps to remove any buildup of dirt or grime.
- Ventilation is Critical: Ensure your bathroom is well-ventilated. Use exhaust fans to reduce humidity levels after showers or baths.
- Inspect for Mold: Check for any signs of mold or mildew regularly. Address them promptly with mold-resistant cleaners.
- Quick Dry: After heavy moisture exposure, such as a shower, dry off shiplap surfaces. This prevents water from soaking into the wood.
- Re-seal When Needed: Over time, the sealant on shiplap can wear off. Reapply a bathroom-safe sealant to protect against moisture.
- Avoid Harsh Chemicals: Don’t use strong cleaners on shiplap walls, as they can damage paint or the wood itself.
- Humidity Control: Consider a dehumidifier for constant humidity control in your bathroom.
Implement these steps for your shiplap bathroom wall, and you’ll enjoy a fresh and pristine look year-round. Remember that maintenance is easier than repair, so be consistent with your upkeep routines.
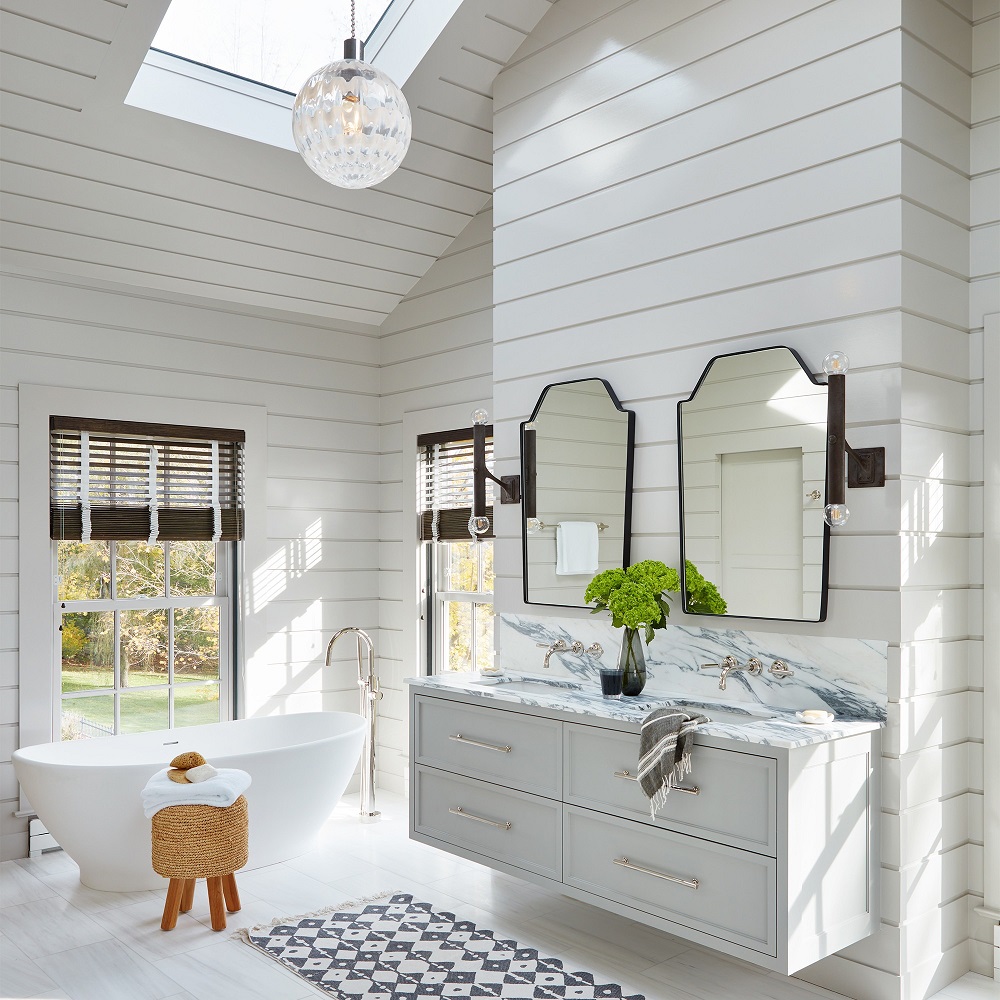
Accentuating Shiplap Walls with Bathroom Fixtures and Decor
Once your shiplap bathroom wall is in place, the right fixtures and decor can make it shine. Coordinate with Metals. Choose fixtures with metal finishes that match well with shiplap. Polished chrome or brushed nickel give a clean, modern feel. Incorporate Lighting. Install sconces or pendant lights that cast a warm glow and highlight the texture of shiplap. Add Mirrors. A large mirror can reflect light and make the space feel bigger. Use Shelving and Storage. Floating shelves or built-in cabinets add function without cluttering. Opt for styles that complement the rustic charm of shiplap. Pick Decor Wisely. Hang art or baskets that enhance the room’s aesthetic. Keep it simple to avoid overwhelming the walls. Install Towel Bars and Hooks. Select designs that work with the lines of the shiplap for a cohesive look. Choose the Right Rug.
Remember that less is more when decorating a shiplap bathroom wall. Each item should serve a purpose and complement the overall design. With thoughtful choices, your shiplap wall can be the perfect backdrop to a stylish, functional bathroom.
Creative Layouts and Patterns for Shiplap Installation
When it comes to installing your shiplap bathroom wall, the layout and pattern you choose can greatly impact the room’s aesthetic. Here are some creative ideas to consider:
- Horizontal Arrangement: The most common shiplap layout. It gives the illusion of a wider space and adds to the rustic charm.
- Vertical Application: A vertical pattern can make the ceiling appear higher. It brings a unique and elegant touch to the bathroom.
- Herringbone Pattern: For a dynamic and modern look, try a herringbone layout. This pattern adds movement and interest to your walls.
- Staggered Seams: Avoid lining up your shiplap boards perfectly. A staggered approach lends a more natural and casual feel.
- Diagonal Placement: Diagonal lines create a bold statement. They draw the eye and make the wall a focal point.
- Mixed Width Planks: Combine narrow and wide shiplap boards. This varied approach adds texture and depth to your bathroom design.
- Accent Features: Use shiplap to create an accent wall or a distinctive feature around mirrors and vanities.
- Painted Patterns: After installation, consider painting geometric patterns or stripes. This brings color and adds a playful element to the room.
Each shiplap layout brings a different energy and can completely transform the look of your bathroom. Consider the vibe you want to achieve and choose accordingly. Always remember to factor in the practical aspects of installation and ensure that you’re working with the existing structure of your bathroom. With the right layout, your shiplap bathroom wall will add character and style to your modernized space.
Real-Life Examples of Shiplap Bathroom Transformations
Transforming a bathroom with a shiplap bathroom wall can have a stunning effect. Here are real-life examples showing how this feature can redefine your space:
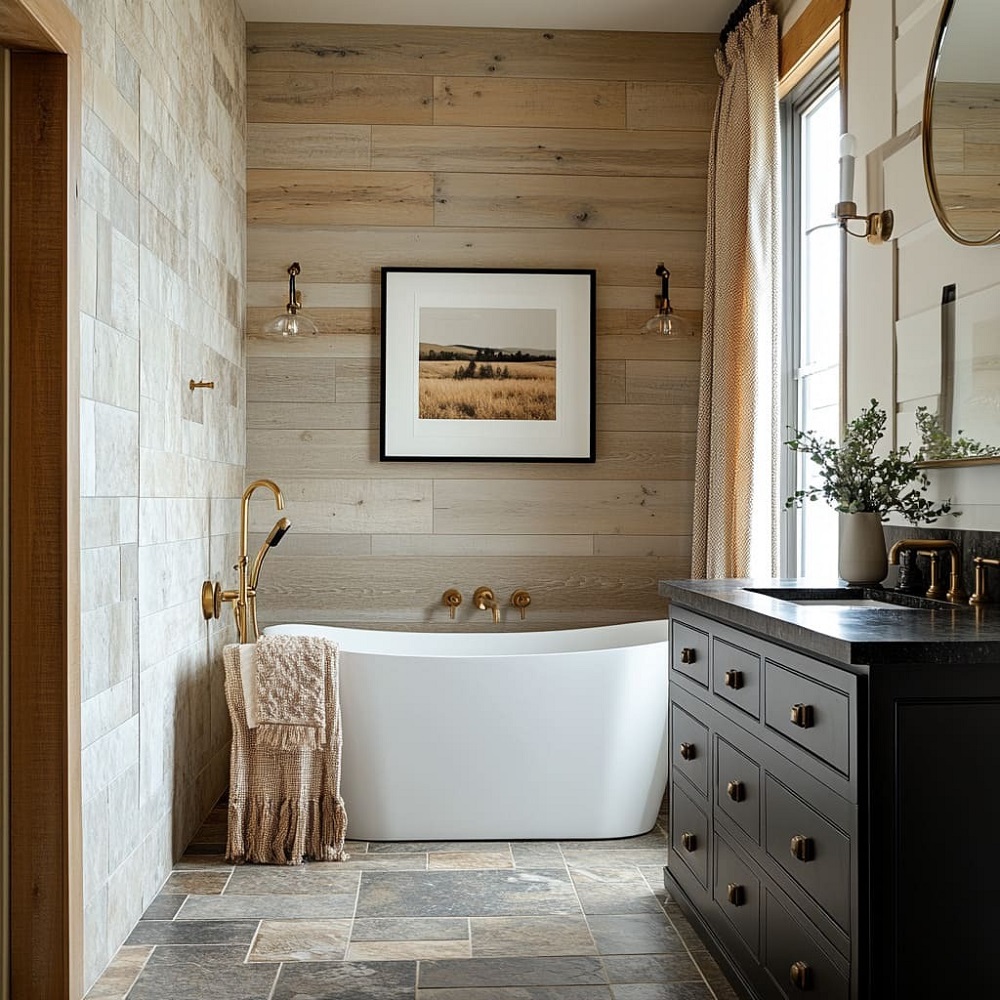
- Farmhouse Chic: One homeowner selected white painted shiplap to create a bright, classic farmhouse look. Paired with vintage faucets and a claw-foot tub, the shiplap brought a cozy, timeless appeal to the bathroom.
- Modern Minimalism: Another example is a minimalist bathroom where clean lines and a monochrome color palette dominate. Here, the shiplap is kept natural, with a clear sealant to highlight the wood’s grain, adding warmth to the room’s modern design.
- Coastal Retreat: In a coastal-themed bathroom, the use of blue-painted shiplap walls, complemented by sandy tiles and seashell decor, made for a serene beach-like sanctuary.
- Eclectic Enclave: One unique bathroom combined shiplap with mixed metals and antique pieces, creating an eclectic yet harmonious space. The juxtaposition of old and new made the shiplap stand out as both contemporary and nostalgic.
- Rustic Elegance: For those who love rustic charm, a bathroom with dark-stained shiplap and antique brass fixtures offered a luxurious yet down-to-earth vibe, proving that shiplap can be elegant and rugged.
- Industrial Edge: A homeowner went for an industrial look, installing gray shiplap and pairing it with matte black fixtures and exposed pipes. The result was a chic, urban feel that remained warm and inviting.
These examples illustrate how different styles and color schemes can dramatically alter the ambiance of a bathroom. Shiplap walls provide a versatile canvas to express your personal style while adding value and character to your home. Whether you choose a bold or subdued approach, the transformative power of shiplap in bathroom design is clear.