The Essence of a 70s Bathroom: Key Features and Decor
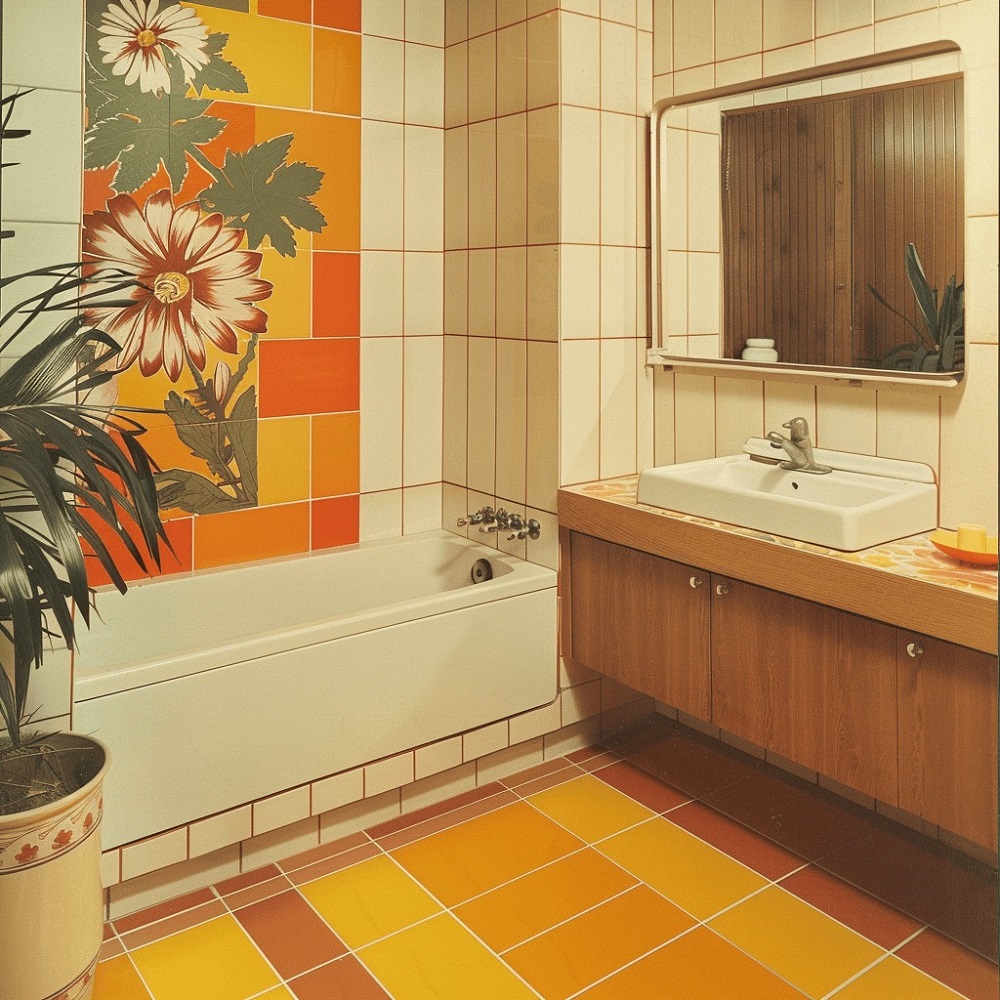
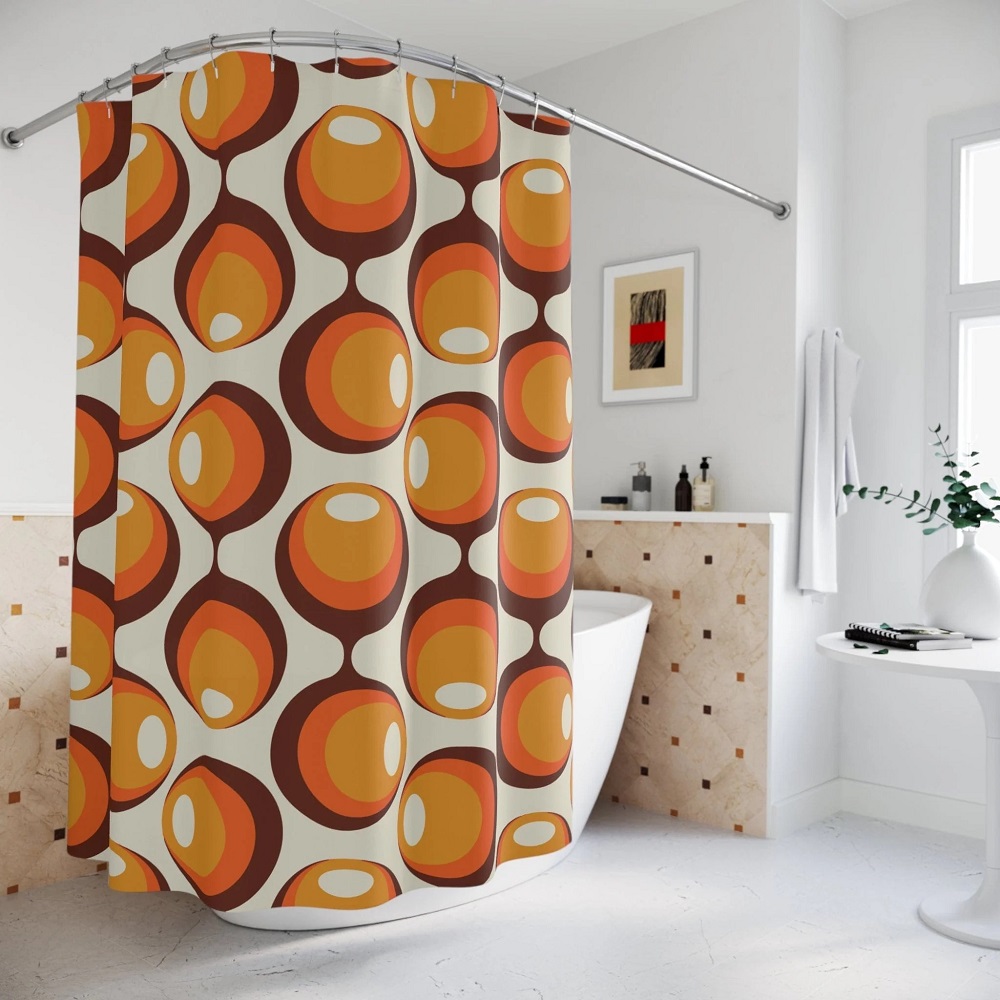
The 70s bathroom evokes a sense of nostalgia with its distinctive features and decor. To capture the essence of this era, focus on certain key elements that define the 70s aesthetic. Bold, vibrant colors and patterns are essential. Think oranges, greens, and yellows – colors that encapsulate the energy of the decade. Wallpaper often featured psychedelic or geometric patterns, which added visual interest and a touch of whimsy to the space.
Incorporating natural materials was also popular during the 70s. Rich wood tones on vanities or paneling can give a bathroom that classic retro feel. As for fixtures, remember the colored porcelain sinks and bathtubs; shades like avocado green and harvest gold were all the rage. Metallic accents in gold or brass can bring that quintessential 70s glam.
Textured surfaces played with the sense of touch. Consider adding a shag rug or a fuzzy toilet seat cover to get that tactile experience. Mirrors came in various shapes, often with intricate frames or in unique formations like clusters. Don’t shy away from floral or abstract prints for shower curtains or towels to complete the look. Together, these elements coalesce to form the quintessential 70s bathroom that boasts a vibrant, welcoming atmosphere grounded in history and style.
Choosing the Right Color Palette: Earth Tones and Bold Hues
When delving into the 70s bathroom design, the color palette plays a critical role. Earth tones like brown, beige, and terra cotta offer a comfortable, grounding base. These colors reflect the era’s penchant for nature and organic vibes. To add an authentic 70s touch, incorporate bold hues. Bright oranges, sunny yellows, and olive greens capture the period’s spirit and energize the space.
To balance the vibrant colors, use neutrals as a backdrop. White or light grey can tame the boldness without losing the retro feel. Be strategic with color placement. Use bold colors on smaller surfaces or accessories. This prevents the space from feeling overwhelming. A feature wall with a vibrant wallpaper design can serve as a stylish focal point.
Remember, the key is cohesion. Select a primary color and complement it with secondary shades that harmonize rather than clash. A color wheel can guide you in choosing complementary colors. For instance, pairing warm orange tones with cool blues creates a pleasing contrast.
In your 70s bathroom, colors should blend but also pop. An avocado green sink can stand out against a more subdued wall color. Similarly, a harvest gold bathtub can become a centerpiece when offset by neutral flooring. By selecting the right combination of earth tones and bold hues, you’ll craft a space that is both true to the 70s aesthetic and welcoming.
Iconic 70s Bathroom Materials: Ceramic Tiles, Wood, and Shag Carpets
Choosing materials is crucial for a 70s bathroom design. Ceramic tiles are a top pick. They are durable and come in many colors and patterns. Look for tiles with bold geometric or floral patterns to nail the 70s look. Place them on walls or as flooring to make a statement.
Wood is another key material for a 70s-inspired bathroom. Dark wood tones add warmth and a natural touch to the space. Use it for cabinets, shelving, or paneling. It pairs well with bright colors and helps create a cozy, retro vibe.
Don’t forget the shag carpets. They were a hit in the 70s and give your bathroom a unique and soft feel underfoot. Place a small one in a bold color next to the bath or sink. Stick to washable options for hygiene.
Blending these materials the right way brings the 70s bathroom to life. Ensure balance with the room’s overall color scheme and decor to achieve a harmonious retro look.
Modern Upgrades for Your Vintage Bathroom: Fixtures and Technology
While staying true to the 70s bathroom style, modern upgrades can enhance both functionality and aesthetics. Upgrading fixtures and incorporating technology will keep your bathroom up-to-date without compromising its retro charm.
For fixtures, consider replacing old taps and showerheads with new models that have vintage designs but modern efficiency. Look for items with a bronze or brass finish to maintain that 70s appeal while offering improved water saving. LED lighting can replace outdated fluorescent lights, providing energy efficiency and better illumination.
Think about installing a modern toilet with a vintage look. High-efficiency models save water and come in designs that fit the 70s theme. A digital shower system can also offer a touch of luxury. It allows precise temperature control, which is a nice nod to modern comfort.
For technology, introduce a Bluetooth speaker system for a hidden sound setup. Music from the era can fill your bathroom, enhancing the retro experience. Infloor heating is another upgrade that improves comfort without altering the vintage style. It keeps the floor warm and is invisible once installed.
In all your upgrades, match the new with the old. Modern elements should blend in, not stand out. This way, your 70s bathroom remains a cohesive nod to the past, equipped for the future.
Accessorizing Your 70s Bathroom: Lighting and Ornamental Elements
Accessorizing is key to enhancing your 70s bathroom’s nostalgic feel. Lighting and ornamental elements are where your personality shines. Here are ways to add flair to your retro space.
First, focus on lighting fixtures. Lamps with colored glass or metal shades offer a vintage touch. Go for pendant lights or sconces in brass or bronze to echo the 70s style. These fixtures not only illuminate but also act as statement pieces.
Next, consider wall art. Opt for framed posters or paintings that reflect 70s culture. Look for pop art, iconic music album covers, or abstract prints. They add color and character to the walls without overpowering the space.
Mirrors are both functional and decorative. Choose ones with bold, geometric frames or sunburst designs. These add depth and reflect light, making the room seem bigger.
Incorporate ornamental items like macrame plant hangers or pottery. These elements bring in texture and earthiness, hallmarks of the 70s look. Place them on shelves or hang them to maximize space.
For the final touch, select bathroom accessories that match your theme. Think soap dispensers, toothbrush holders, and waste baskets in vintage styles. Matching your towels and bath mats to your chosen color palette ties everything together.
Remember, accessorizing is all about balance. Blend lighting and ornamental elements carefully. They should harmonize with your 70s bathroom, not overwhelm it. Keep it simple and stylish for the perfect retro retreat.
Integrating Plants and Natural Elements: Bringing the Outdoors Inside
In the 70s, the trend of bringing nature indoors flourished. This design approach made spaces feel fresh and vibrant. To recreate this in your bathroom, introduce a variety of plants. Choose low-light, high-humidity options like ferns, spider plants, or peace lilies. They thrive in bathroom conditions.
Use natural materials to display these plants. Think bamboo shelves or macrame hangers. Such materials complement the 70s bathroom vibe well. Place plants at different heights to create visual interest. Hang some near the window and set others on countertops.
Consider adding stones or wood elements for extra texture. For instance, a stone soap dish or wooden frames can enhance the earthy atmosphere. These touches connect the inside space to the natural world of the 70s era.
Incorporate a small water feature if space allows. A tabletop fountain can add a calming sound and feel to the room. This element also adds humidity, which is good for plant health.
Lastly, use natural light whenever possible. It’s ideal for plants and adds a sense of openness. If your bathroom lacks windows, choose lights that mimic natural light. This will help your plants grow and keep your bathroom bright and inviting.
By integrating plants and natural elements, your 70s bathroom will gain a fresh and organic touch. It brings the outdoors inside, staying true to the era’s love for nature.
DIY Tips for Creating a 70s Vibe on a Budget
Creating a 70s bathroom doesn’t have to drain your wallet. With DIY tips, you can bring that retro flair to life without spending a fortune. Start with paint. A fresh coat in an earthy or bold hue can transform the space instantly. Look for samples or leftovers at your local hardware store for a bargain.
Next, scour thrift shops and flea markets for vintage finds. A funky lamp or a retro stool can add character. DIY wallpaper alternatives, like fabric or wrapping paper, can give you that bold pattern without the cost. Simply attach with removable adhesives. Update cabinet knobs with brass or bronze paint for an instant 70s look. Look for tutorials online to guide you.
Add homemade art or upcycled items to decorate. Frame old records or make a wall hanging from yarn. These personal touches make your bathroom unique. For textiles, revive old towels with tie-dye or sew new covers for washable shag rugs. These can be done at home with basic supplies.
Lastly, DIY plant pots from jars or vintage containers enhance the natural 70s vibe. Mix and match styles for an eclectic look. With creativity and some elbow grease, you can craft a 70s bathroom that’s both nostalgic and budget-friendly.
Renovating a 70s bathroom comes with unique challenges requiring careful planning and attention to detail. One key hurdle is finding authentic materials and fixtures that replicate the period’s look. Vintage shops, salvage yards, and online marketplaces can be goldmines for period-appropriate items. When sourcing these, ensure they are still functional and fit for modern standards.
Another challenge is balancing the authentic 70s aesthetic with contemporary building codes and plumbing requirements. Older homes may have outdated pipes and electrical systems, which need upgrading to meet today’s safety standards. Consulting with a professional who understands both modern requirements and period-style renovations is critical.
Achieving the 70s color palette can be tricky, too. Paint colors from the decade might not be readily available, and custom mixes may be necessary. For wallpapers and tiles with vintage patterns, reproduction options are available if originals can’t be found. For these, focus on matching the overall vibe rather than the exact design.
Maintaining structural integrity while updating fixtures is vital. Structural changes, like enlarging the bathroom or shifting walls, could disrupt the original design. Where possible, work within the existing layout. Reinvent the space using smart design tricks rather than extensive structural work.
Finally, stay flexible and creative. Sometimes, the perfect 70s piece you envision may not be accessible. In these cases, looking for modern items with a retro twist can preserve the spirit of the era without sacrificing the overall look. With a bit of ingenuity and dedication, you can navigate these challenges successfully and bring your retro 70s bathroom vision to life.