Kitchen cabinets are the backbone of any kitchen, providing essential storage and contributing significantly to the room’s overall aesthetic. Over time, however, even the most well-maintained cabinets can suffer from wear and tear. Whether it’s due to age, heavy use, or accidental damage, knowing how to handle kitchen cabinet repair is crucial for maintaining both functionality and visual appeal. This comprehensive guide will explore various aspects of kitchen cabinet repair, offering practical solutions and tips to help you restore your cabinets effectively and economically.
 Common Issues with Kitchen Cabinets
Kitchen cabinets are prone to various issues over time. Recognizing these common problems helps address them promptly.
Identifying Wear and Tear
Wear and tear occur naturally with daily use. Look for scratches, dents, or faded surfaces. Check for chipped paint, peeling laminate, or water stains. Hinges and handles might loosen or rust over time. Regularly inspect corners, edges, and frequently used areas.
Diagnosing Structural Problems
Structural problems can affect cabinet stability. Examine the cabinet frame for cracks or warp. Check for sagging shelves, particularly in heavily loaded cabinets. Loose joints or screws can weaken overall structure. Water damage might lead to swelling or rotting wood panels. Early detection is vital to prevent bigger issues.
Tools Required for Cabinet Repair
Having the right tools is essential for effective kitchen cabinet repair. The right tools make repairs easier and improve results. Below are the key tools you’ll need.
Essential Hand Tools
Hand tools are vital for most cabinet repair tasks. Start with a reliable screwdriver set to tighten screws or adjust hinges. A hammer can help fix loose nails or hardware. Use a measuring tape for accurate dimensions and alignments. A putty knife is useful for filling cracks or applying wood filler. Sandpaper is essential for smoothening scratches and dents. Pliers can be helpful for pulling nails or adjusting handles. Lastly, a paintbrush can be used for touch-ups or refinishing surfaces.
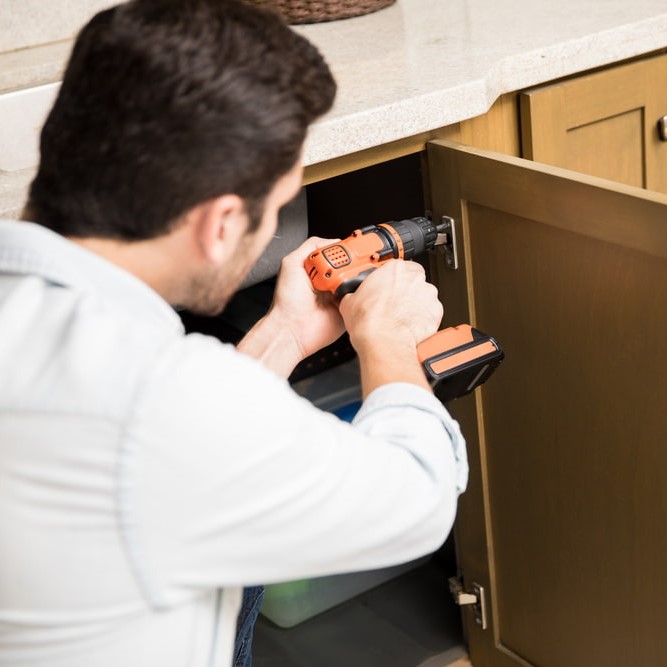
Recommended Power Tools
Certain repairs may require power tools for efficient results. A cordless drill is great for installing screws or hardware quickly. A power sander speeds up sanding large surfaces like cabinet doors. A jigsaw is ideal for cutting new panels or fixing shapes. If refinishing, consider a portable spray gun for even paint application. A heat gun can help remove old paint or laminate. Ensure you have safety gear like gloves and goggles for power tool usage. These tools make challenging repairs faster and easier.
Step-by-Step Guide to Fixing Cabinet Doors
Fixing cabinet doors can restore functionality and improve the overall look of your kitchen cabinets. Follow these clear steps to tackle common door issues easily.
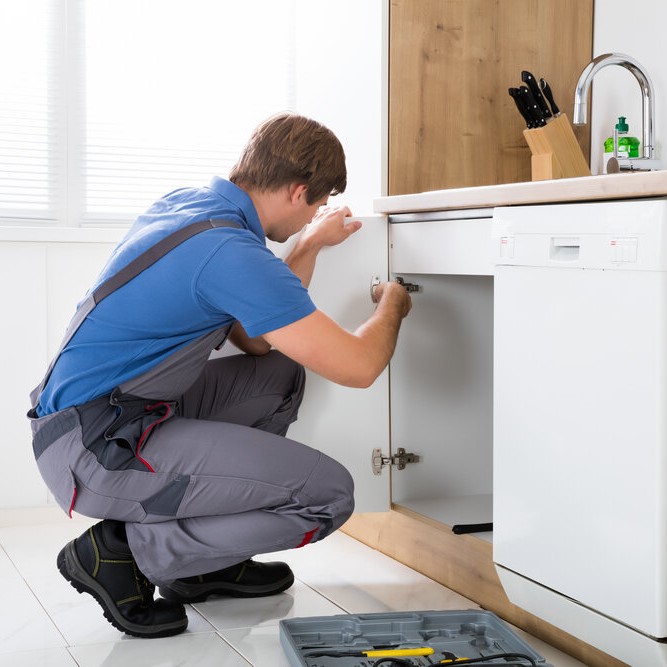
Adjusting Hinges for Proper Alignment
Misaligned hinges can make cabinet doors uneven or hard to close. Here’s how you can fix them:
- Inspect the hinges to identify loose screws or gaps.
- Use a screwdriver to tighten the screws securely.
- If the hinges are bent or damaged, replace them with new ones.
- Adjust the hinge position slightly to align the door properly.
- Close the door and test its movement to ensure smooth operation.
Proper hinge adjustment prevents strain on the cabinet frame and maintains its stability.
Repairing Broken Handles and Knobs
Handles or knobs can loosen or break with frequent use. To fix them, follow these steps:
- Remove the damaged handle or knob using a screwdriver.
- Clean the surface where the new hardware will be installed.
- Choose a new handle or knob suitable for the cabinet design.
- Align the new hardware to match the screw holes on the cabinet.
- Secure the screws tightly using the screwdriver.
- Test the handle or knob to confirm it is firmly attached.
Replacing broken hardware restores cabinet usability and enhances its appearance. Regular inspections can prevent further damage.
 Fixing Cabinet Surfaces
Cabinet surfaces often face daily wear, leading to scratches, dents, and a faded look. Proper repair techniques can restore their appearance and extend their lifespan. Here’s how to address these common surface issues.
Removing Scratches and Dents
Scratches and dents can make cabinets look old and dull. Follow these steps to fix them:
- Clean the area: Wipe the surface with a damp cloth to remove dirt and debris.
- For small scratches: Use a matching wood marker or crayon to fill scratches.
- For deeper scratches: Apply wood filler using a putty knife. Let it dry completely.
- Sand the surface: Gently sand the repaired area with fine-grit sandpaper to smooth it out.
- Touch up: Apply matching paint or stain to blend the repair with the cabinet.
For dents, steam can help:
- Cover the dent with a damp cloth.
- Use an iron on medium heat, pressing over the cloth briefly.
- Repeat until the wood swells and the dent levels out.
These methods can make your cabinets look as good as new.
Refinishing Wood Cabinets
Refinishing can revive dull or worn cabinets and give them a fresh appearance. Here’s how:
- Remove hardware: Take off handles, knobs, and hinges before starting.
- Sand the surfaces: Sand the cabinet thoroughly to remove old paint or stain.
- Clean the cabinet: Wipe down with a damp cloth to remove dust.
- Apply primer: Use a primer suitable for wood to ensure even paint adhesion.
- Paint or stain: Use a paintbrush or spray gun for a smooth finish. Apply multiple thin coats.
- Seal with protective coating: Apply a clear polyurethane coat to protect the finish.
- Reassemble: Reattach the hardware once the finish is completely dry.
Refinishing retains the natural beauty of wood and increases the cabinet’s durability. Regular upkeep can help maintain the look.
Repairing Sliding and Pull-Out Mechanisms
Sliding and pull-out mechanisms can improve kitchen cabinet functionality. Over time, these mechanisms may wear out or stop working smoothly. Addressing issues quickly can restore their performance and extend their lifespan.
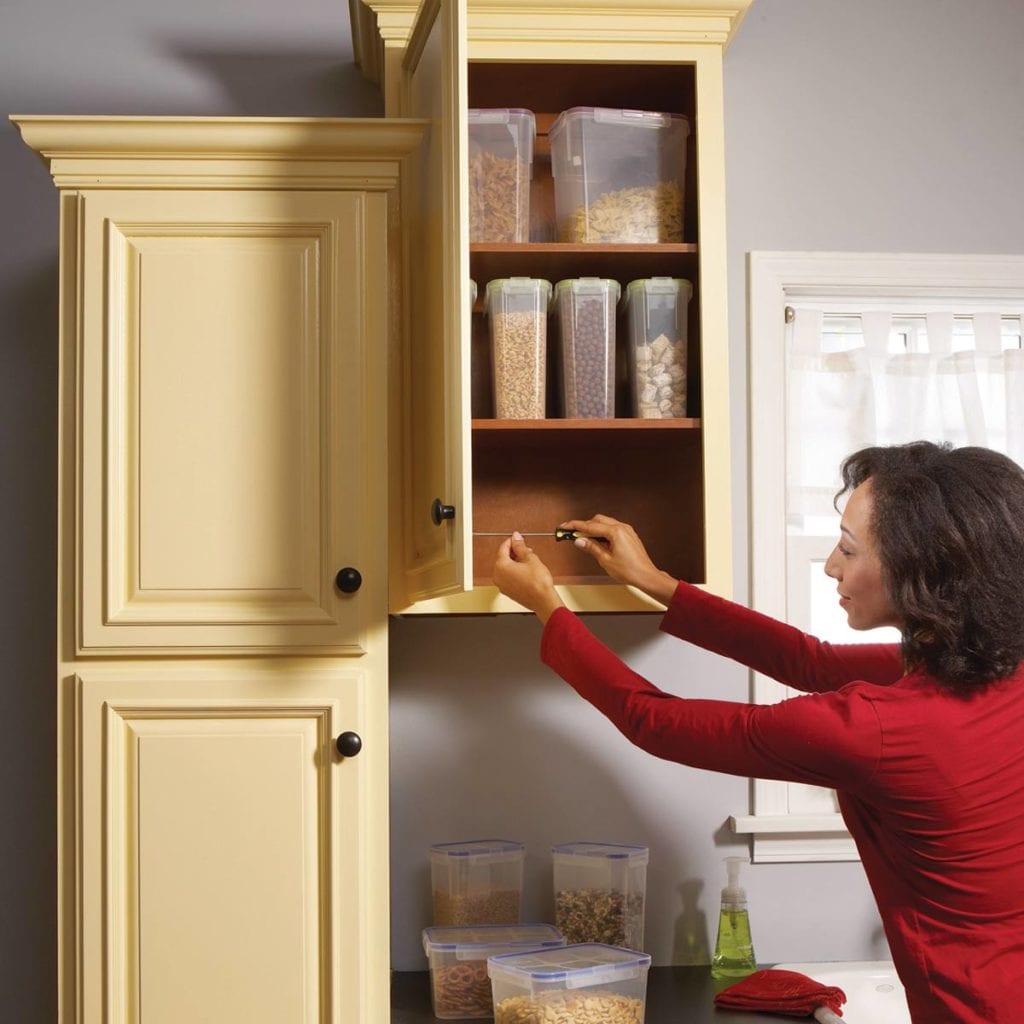
Restoring Smooth Functionality
- Clean the tracks: Remove dirt, debris, or grease with a damp cloth and a mild cleaner.
- Inspect for obstructions: Check the tracks or grooves for stuck objects causing the mechanism to jam.
- Lubricate the moving parts: Use a silicone-based lubricant on the tracks and rollers to enhance smooth movement.
- Tighten loose screws: Use a screwdriver to secure any loose screws that hold the tracks in place.
- Check alignment: Align the tracks properly to ensure smooth sliding or pulling motions.
Regular cleaning and lubrication prevent stiffness and ensure long-lasting functionality.
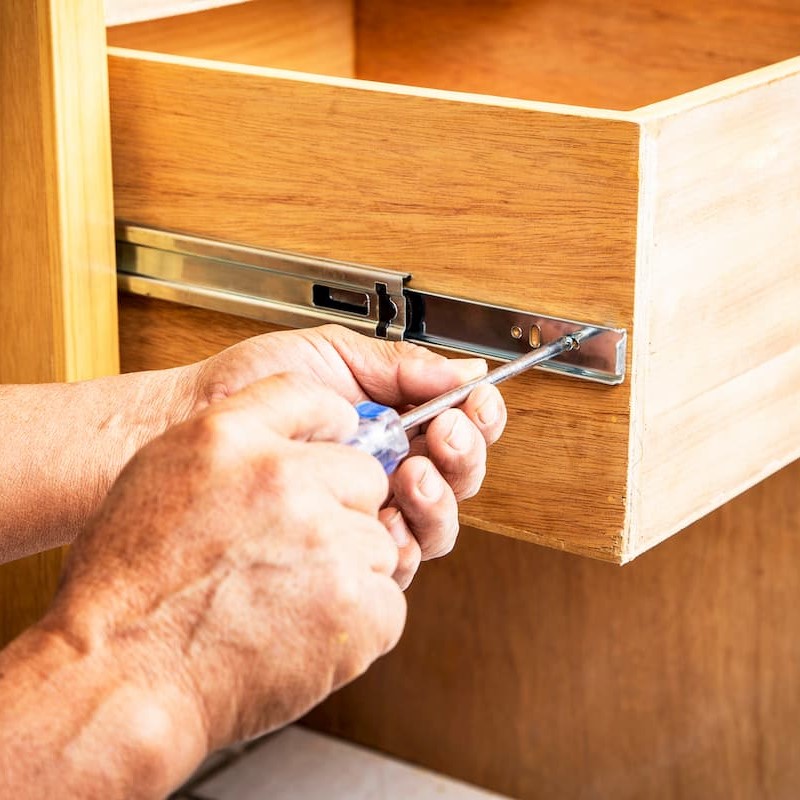
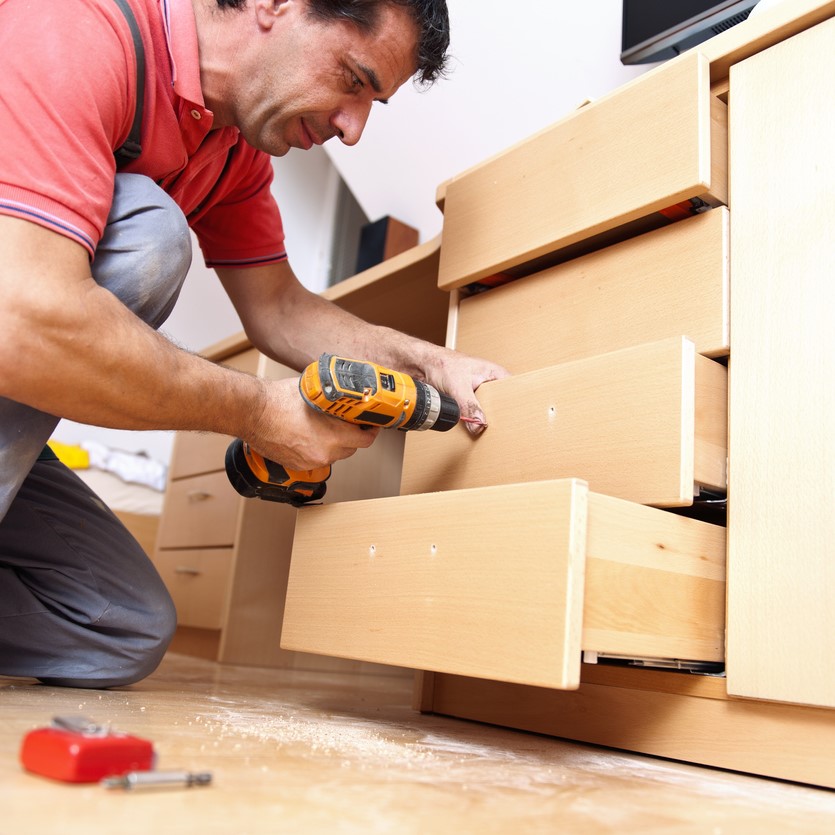
Replacing Damaged Tracks or Rollers
- Remove the damaged parts: Unscrew and carefully take out the worn or broken tracks or rollers.
- Get replacement parts: Purchase new tracks or rollers matching the original design and size.
- Install the new tracks: Align and screw in the replacement tracks securely.
- Attach the rollers: Fix the new rollers to the drawer or cabinet mechanism.
- Test the mechanism: Slide the cabinet door or drawer several times to ensure smooth operation.
Replacing faulty tracks or rollers restores full functionality to cabinets with sliding or pull-out features. Proper maintenance will keep them working efficiently.
 Preventative Maintenance Tips
Preventative maintenance helps extend the lifespan of your kitchen cabinets. Regular care avoids costly repairs.
Keeping Cabinets Clean and Dry
- Clean regularly: Wipe cabinet surfaces weekly with a damp cloth to remove dust and grime.
- Avoid excess moisture: Don’t leave standing water or spills on surfaces. Wipe immediately with a dry cloth.
- Control humidity: Use a dehumidifier in high humidity areas to prevent wood swelling or mold.
- Inspect corners and edges: Check for peeling, damp spots, or water stains during routine cleaning.
- Keep kitchen ventilated: Ensure proper ventilation to reduce moisture accumulation and preserve cabinet quality.
Regular cleaning and drying protect cabinets from water damage and dirt buildup.
Applying Protective Coatings
- Clean thoroughly: Remove dirt before applying any protective coating.
- Choose the right coating: Use water-resistant sealants or varnish designed for kitchen cabinets.
- Apply evenly: Use a brush or spray gun to coat all exposed surfaces.
- Focus on high-use areas: Pay extra attention to doors, shelves, and edges that face daily wear.
- Reapply periodically: Refresh coatings as needed to maintain maximum protection against scratches and stains.
Protective coatings preserve cabinet appearance and shield surfaces from daily wear. Regular application is recommended.
When to Seek Professional Help
Kitchen cabinet repair is often manageable with basic tools and techniques. However, some issues require professional expertise due to their complexity or risk of causing further damage.
Recognizing Complex Repairs
Certain situations call for expert intervention. Here are some signs your cabinets need professional help:
- Extensive structural damage: Large cracks, severe warping, or rotted wood are hard to fix without proper tools.
- Persistent water damage: Swelling, mold growth, or panels separating due to water require specialized material handling.
- Broken mechanisms: Damaged sliding tracks or dysfunctional pull-out systems may need expert calibration or replacement.
- Paint or laminate peeling on a large scale: Refinishing extensive areas professionally ensures better results and durability.
- Complicated replacements: Fitting new cabinet doors, panels, or shelves correctly can be tricky for beginners.
If repairs are beyond your skills or cause further cabinet deterioration, a professional ensures safe solutions.
Choosing the Right Service Provider
Finding the correct expert for kitchen cabinet repair is crucial. Use the following steps to choose wisely:
- Research and reviews: Look for repair specialists with high customer ratings and testimonials.
- Experience: Select providers with extensive experience handling various cabinet repair issues.
- Specialized skills: Ensure they understand material-specific requirements like wood, laminate, or glass repairs.
- Licensing and insurance: Verify their certifications and insurance coverage for a hassle-free experience.
- Transparent quotes: Request detailed estimates that include labor, materials, and timeframe.
- Warranty: Choose services that offer warranties or guarantees for repairs.
Selecting a reliable repair service prevents additional problems and ensures long-term cabinet functionality.
 Leveraging Technology for Efficient Cabinet Repair
Modern technology offers various tools and resources that can streamline the kitchen cabinet repair process, making it more efficient and effective.
Utilizing Online Tutorials and Guides
There are numerous online tutorials and guides available that provide step-by-step instructions for various kitchen cabinet repairs. These resources can be invaluable for DIY enthusiasts, offering tips, techniques, and visual aids to help you complete your projects successfully.
Investing in Quality Tools and Equipment
Investing in high-quality tools and equipment can make your kitchen cabinet repairs easier and more precise. Tools such as high-performance drills, orbital sanders, and accurate measuring devices can improve the quality of your work and reduce the time required to complete repairs.
Exploring Innovative Products for Enhanced Repairs
Innovative products, such as self-leveling hinges or quick-drying paints, can enhance the efficiency and effectiveness of your kitchen cabinet repairs. Staying informed about the latest advancements in repair materials and techniques can help you achieve better results with less effort.
Eco-Friendly Approaches to Cabinet Repair
Adopting eco-friendly approaches in your kitchen cabinet repair projects is not only good for the environment but can also improve the health and safety of your home.
Using Low-VOC Paints and Finishes
Opting for low-VOC (volatile organic compounds) paints and finishes reduces the release of harmful chemicals into the air, creating a healthier indoor environment. These products are just as effective as traditional paints but are better for your health and the environment.
Recycling and Upcycling Cabinet Components
Whenever possible, recycle or upcycle damaged cabinet components instead of discarding them. For example, repurpose broken doors by turning them into decorative wall art or use unused hardware to create unique jewelry pieces. This approach minimizes waste and adds a personal touch to your home.
Choosing Sustainable Materials
When selecting materials for repairs, choose sustainable options such as reclaimed wood or FSC-certified products. These materials are environmentally friendly and can add character and charm to your kitchen cabinets.
 Conclusion
In summary, kitchen cabinet repair is a vital aspect of home maintenance that can significantly enhance both the functionality and aesthetic appeal of your kitchen. By understanding common issues, using the right tools and materials, and following effective repair techniques, you can restore your cabinets to their former glory. Additionally, exploring creative ideas and eco-friendly approaches can further elevate your kitchen’s look while promoting sustainability. Whether you choose to tackle repairs yourself or hire a professional, taking the time to address and maintain your kitchen cabinets will ensure a beautiful and functional kitchen for years to come. Embrace the process of kitchen cabinet repair and enjoy a refreshed, stylish, and efficient heart of your home.