Carpet tiles, also known as modular carpets or square carpets, have gained popularity in both commercial and residential spaces due to their versatility, ease of installation, and the dynamic design possibilities they offer. Unlike traditional carpet rolls, carpet tiles allow for more creative freedom and can be easily replaced if damaged, making them a practical and stylish flooring option. In this comprehensive guide, we will walk you through the steps to install carpet tiles, ensuring a stunning floor makeover that will transform your space.
Preparing for Installation: Planning and Tools
Before embarking on your carpet tile installation journey, it’s crucial to prepare adequately to ensure a smooth process and professional-looking results. Start by measuring the area where you intend to install the carpet tiles to determine how many tiles you will need. It’s advisable to purchase a bit extra to account for cutting and fitting, especially in rooms with irregular shapes or obstacles.
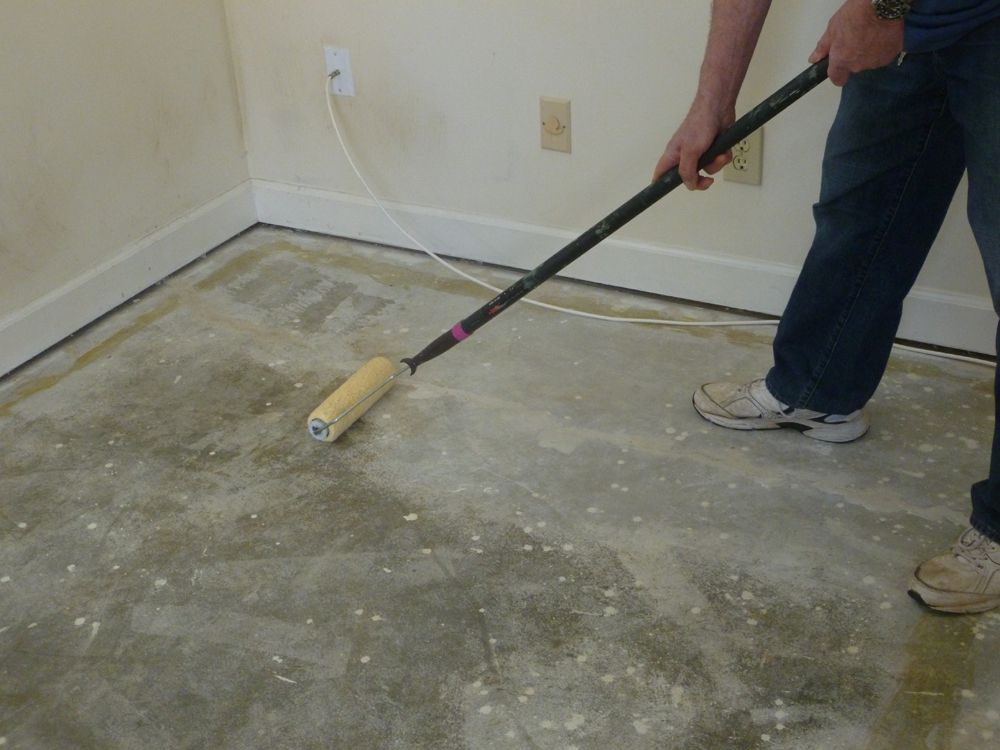
Next, gather the necessary tools and materials for the job. You will need a sharp utility knife, a straight edge or square, a tape measure, chalk line, and adhesive, if not using self-adhesive carpet tiles. Ensure the subfloor is clean, dry, and smooth. Any cracks, holes, or uneven areas should be repaired, and existing flooring must be removed if it will affect the new installation’s quality or height.
Design and Layout: Visualizing Your Space
One of the exciting aspects of carpet tiles is the ability to create unique patterns and designs. Before installation, take time to consider the overall look you wish to achieve. Whether you’re aiming for a uniform appearance or an intricate pattern, laying out your tiles beforehand allows you to visualize the final outcome and make any necessary adjustments.
When planning the layout, decide on the direction of the tiles. Some prefer all tiles to face the same direction, resulting in a seamless look, while others may choose to rotate tiles for a more textured effect. Consider marking the center of the room and laying tiles from the middle outwards to ensure even distribution and fit.
The Installation Process: Step-by-Step
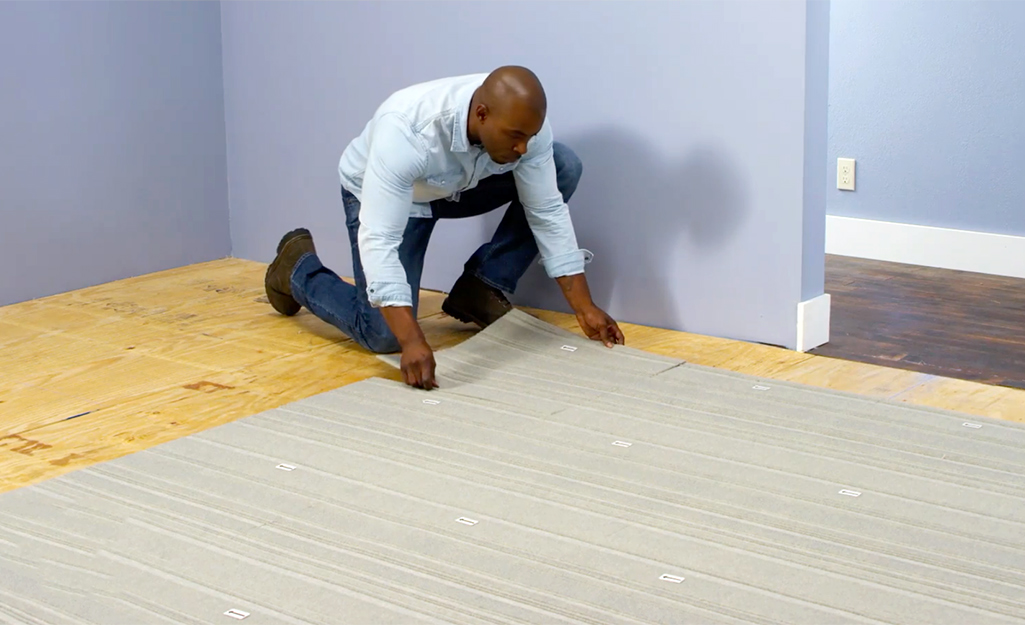
- Starting Point: Begin at the center of the room. Use your chalk line to mark intersecting lines, creating quadrants. This will be your starting point, ensuring your installation is symmetrical.
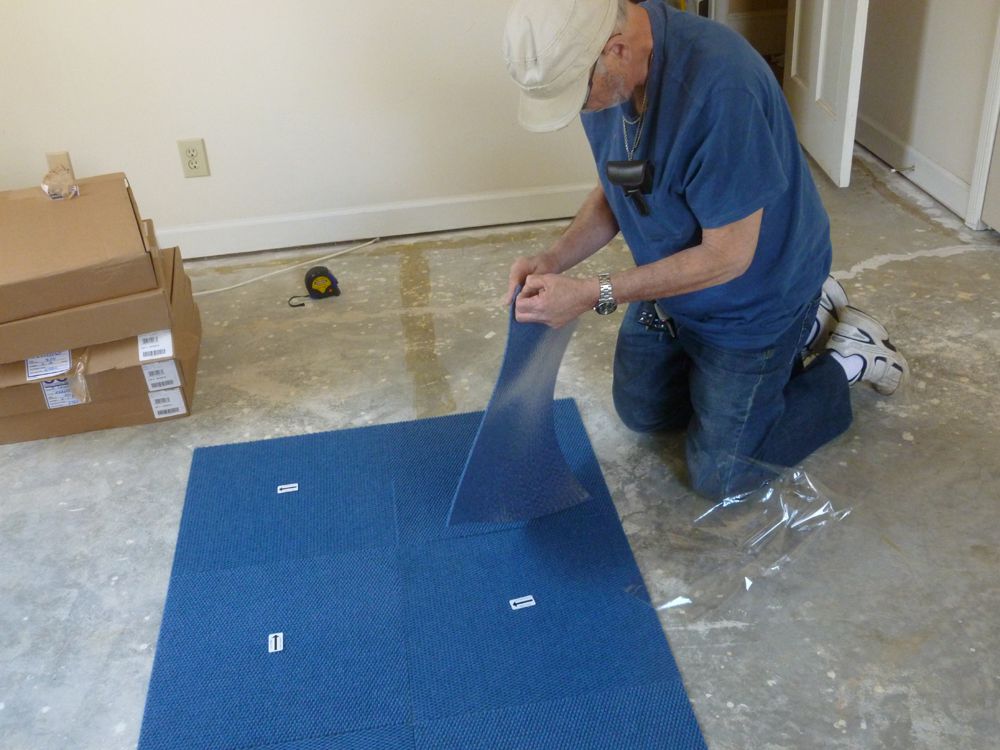
- Laying the First Tile: Place the first tile at the intersection of your chalk lines, carefully aligning its edges. If using adhesive tiles, remove the backing and press firmly into place. For non-adhesive tiles, apply adhesive according to the manufacturer’s instructions.
- Expanding the Layout: Continue laying tiles outward from the first tile, adhering to your chosen pattern. Keep tiles snug against each other to avoid gaps. Use your straight edge and utility knife to cut tiles as needed, ensuring they fit around corners and edges.
- Finishing Touches: Once all tiles are laid, go over the floor with a roller to ensure proper adhesion and eliminate air bubbles. Trim any excess material from the edges for a clean finish.
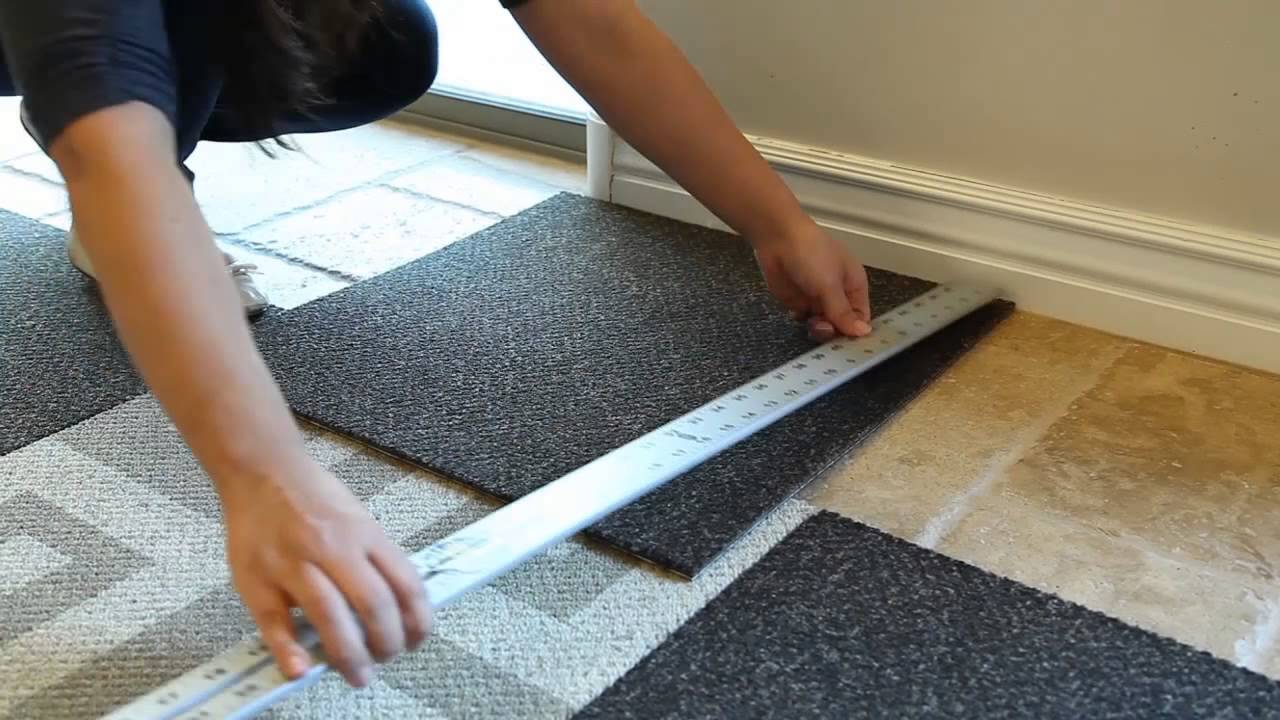
Cutting and Fitting: Precision Matters
Cutting tiles to fit around obstacles or in corners is inevitable. For precise cuts, measure the space and transfer these measurements to the tile. Use a straight edge to guide your utility knife, applying firm pressure for a clean cut. Test fit the tile before removing any adhesive backing or applying adhesive.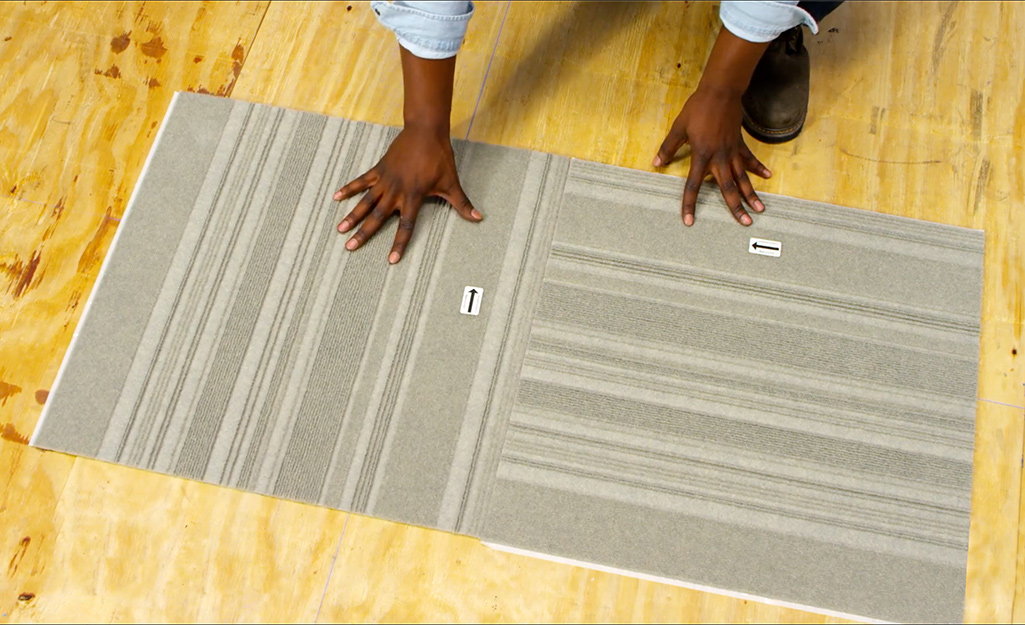
Adhesive Techniques: Ensuring Longevity
The choice of adhesive can impact the longevity and performance of your carpet tiles. For self-adhesive tiles, ensure the subfloor is free of dust and debris before installation. For tiles requiring separate adhesive, apply evenly and sparingly, avoiding oversaturation which can seep through the tiles.
Maintenance and Care: Preserving Your New Floor
Carpet tiles are low maintenance but require regular care to keep them looking their best. Vacuum regularly to remove dirt and dust, and address spills promptly to prevent staining. Individual tiles can be lifted and replaced if severely stained or damaged, a significant advantage over traditional carpeting.
Maximizing Design Potential with Carpet Tiles
Carpet tiles offer an unparalleled opportunity to customize your flooring to match your decor, personality, and functional needs. Beyond the basic installation, consider exploring the following to elevate your space:
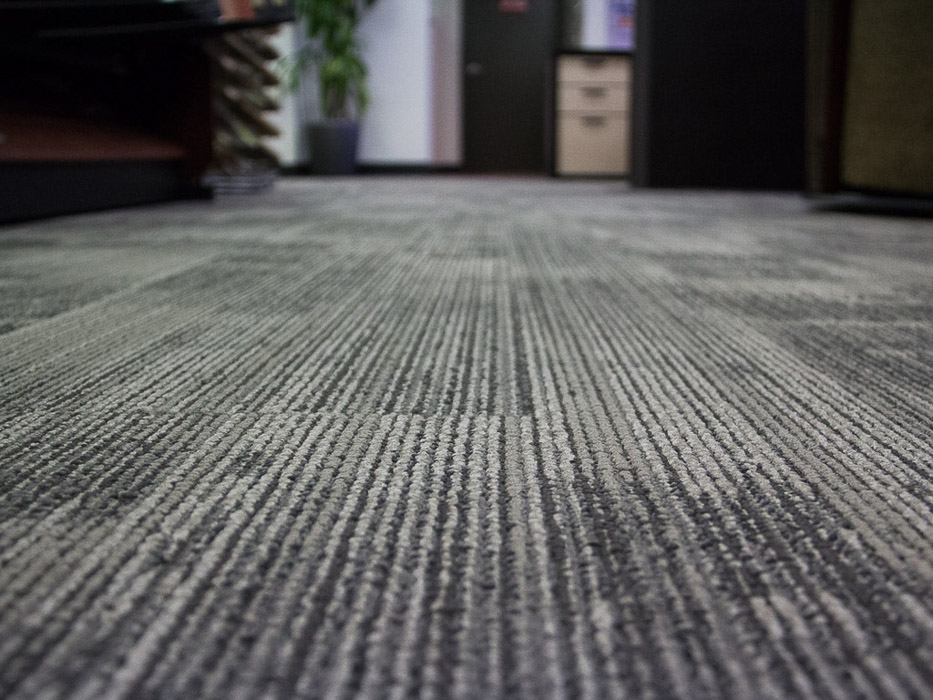
- Color Blocking and Patterns: Use contrasting colors to create zones or pathways within a room, which can be particularly effective in open-plan spaces or commercial settings like offices. Geometric patterns, such as herringbone or chevron, can add dynamism and visual interest to any room.
- Texture Play: Mix tiles with different textures to add depth and tactile variety to your floor. This can also help in defining areas within a larger space, using smoother textures for high-traffic areas and plusher options for cozy corners.
- Eco-Friendly Options: Many manufacturers now offer carpet tiles made from recycled materials. These options not only contribute to a more sustainable environment but also come in a variety of styles and colors, proving that eco-friendly choices don’t have to compromise on aesthetics.
Troubleshooting Common Installation Challenges
Even with careful planning, you might encounter some challenges during the installation of carpet tiles. Here are tips for overcoming common issues:
- Dealing with Uneven Subfloors: If your subfloor has minor imperfections, consider using a thicker carpet tile to help absorb these irregularities. For more significant issues, it may be necessary to level the floor with a self-leveling compound before installation.
- Adhesive Failure: In environments with fluctuating temperatures or humidity levels, adhesive might fail prematurely. Ensure you’re using an adhesive compatible with your specific conditions, and consider the use of double-sided carpet tape in areas prone to problems.
- Seam Visibility: To minimize the appearance of seams, ensure that all tiles are tightly butted against each other during installation. In some cases, rotating tiles so that the pile direction varies can help disguise seams, especially with textured or patterned tiles.
Conclusion: Enjoying Your Transformed Space
Installing carpet tiles can dramatically transform any space, adding warmth, texture, and style. By following this detailed guide, you can achieve a professional-looking installation that not only enhances the aesthetic of your room but also offers flexibility and practicality. Whether you’re updating a home office, refreshing a living room, or renovating a commercial space, carpet tiles provide a versatile and attractive flooring solution that can be tailored to suit any design vision.